Far Cry 6 Guide: All Criptograma Chest Locations
Throughout Far Cry 6’s fictional explosions-filled paradise of Yara, you’ll find locked puzzle boxes called Criptograma chests. To unlock these boxes, you need to find two charts per locked box to open them.
With 15 chests scattered all across Yara, that’s a lot of boxes to hunt down. Why go through the trouble, you may ask? These Criptograma chests contain the Mark II Rioter, Fuego, and Hazmat armour sets. Putting these on will help reduce all sorts of damage you’ll be receiving, making you die less or not at all if you’re planning full-on guerilla assaults.
How to find each and every one of the Criptograma chests
Chest #1
Location: North of Armonia on Isla Santuario. Remember the first town in the game where you met Juan? Head north from there.
Reward: Hasmat Gloves MK II (poison resistance).
Chart Location: The #06 Royal Palm chart is on the roof of the house in front of the chest. The #01 Yaran Flag chart is on the right side of the house; it’s concealed in a giant steel pipe.
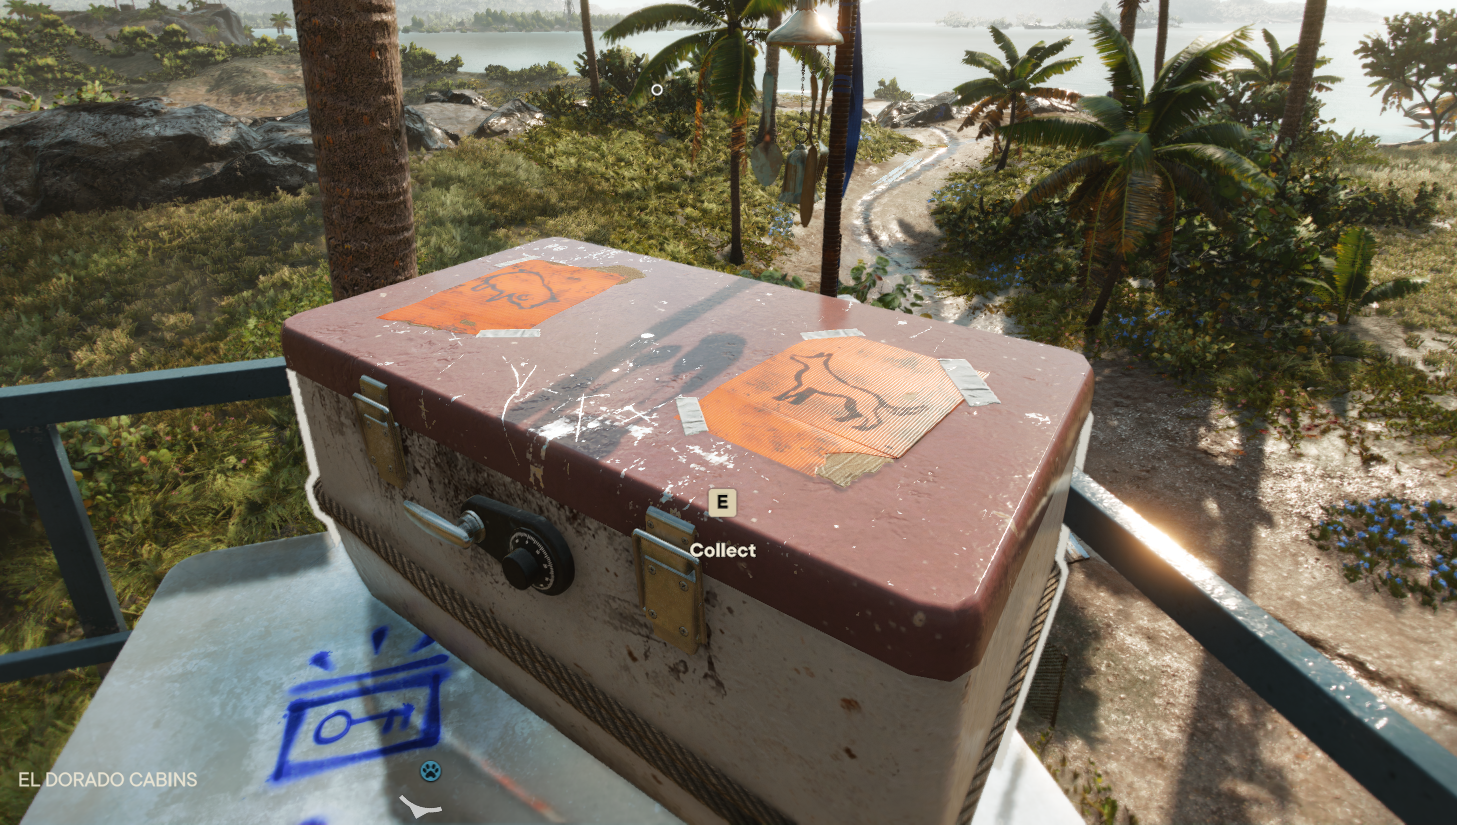
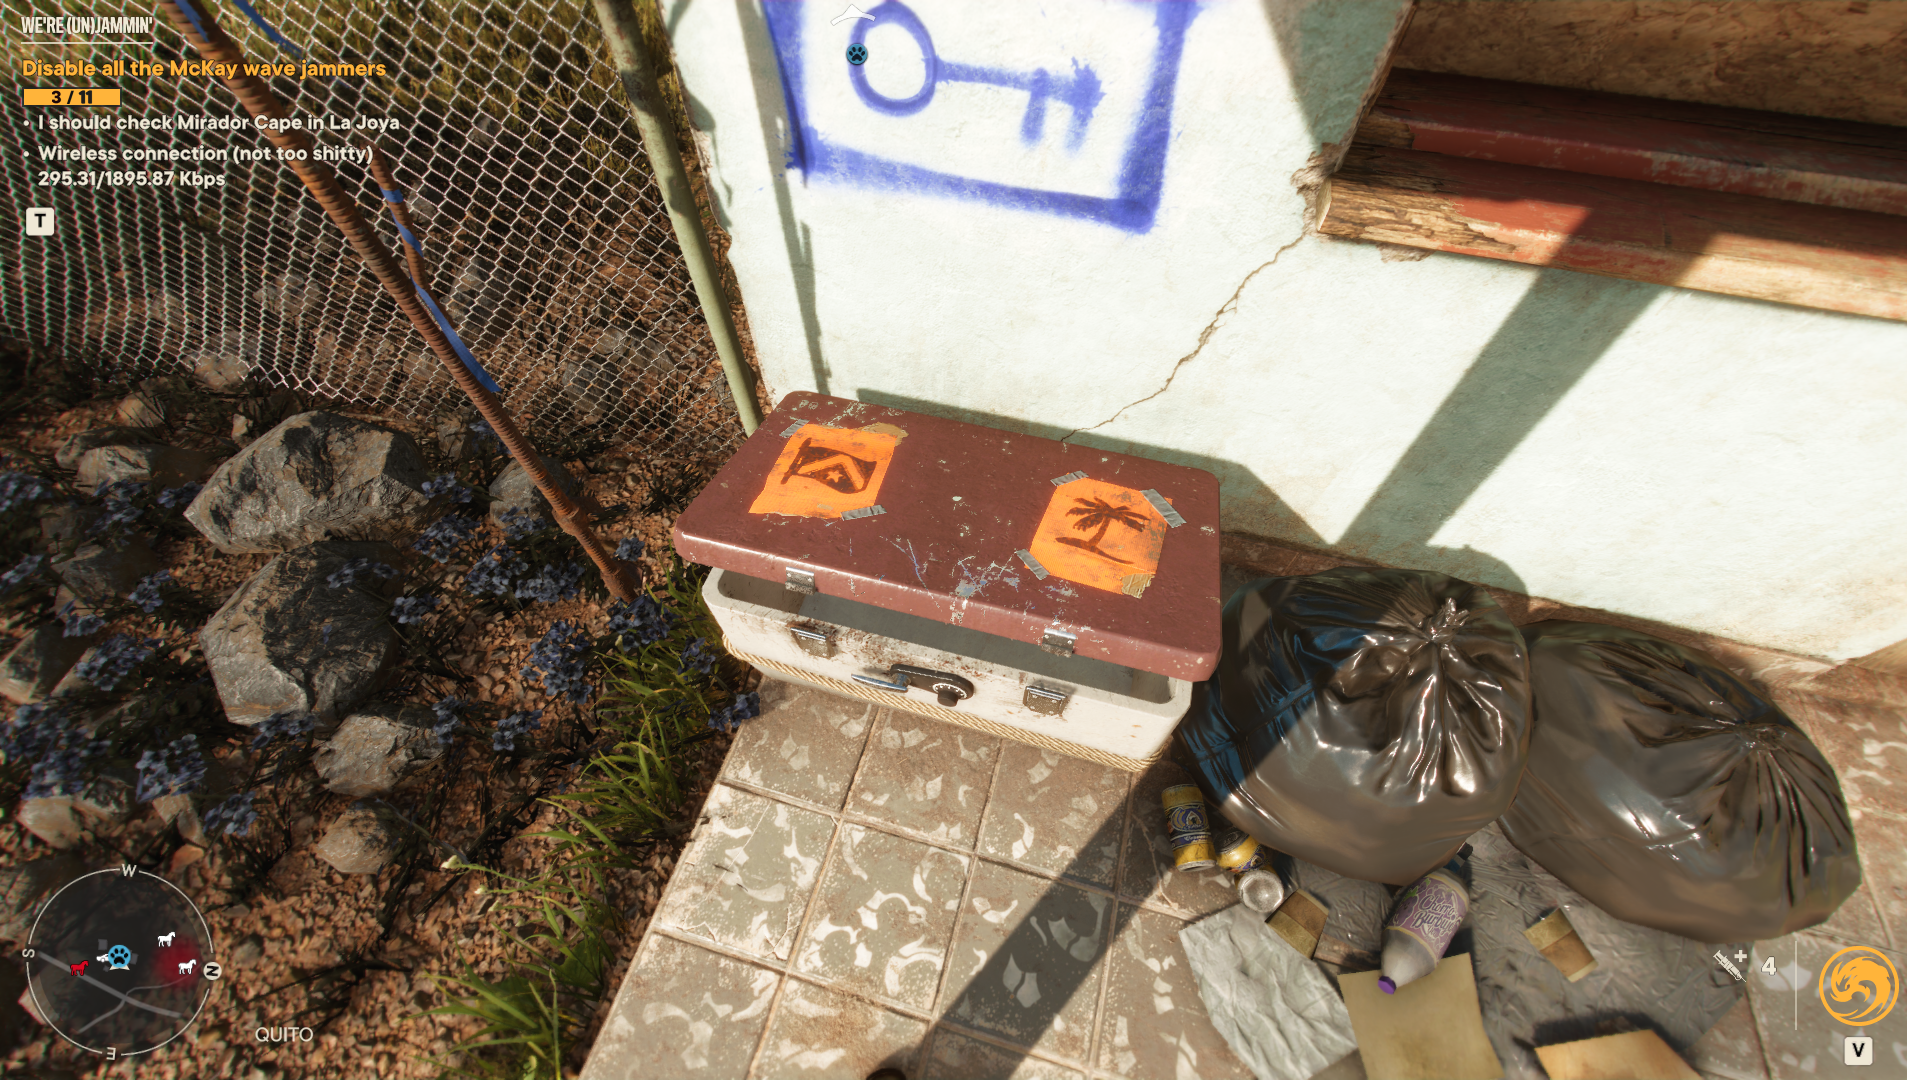
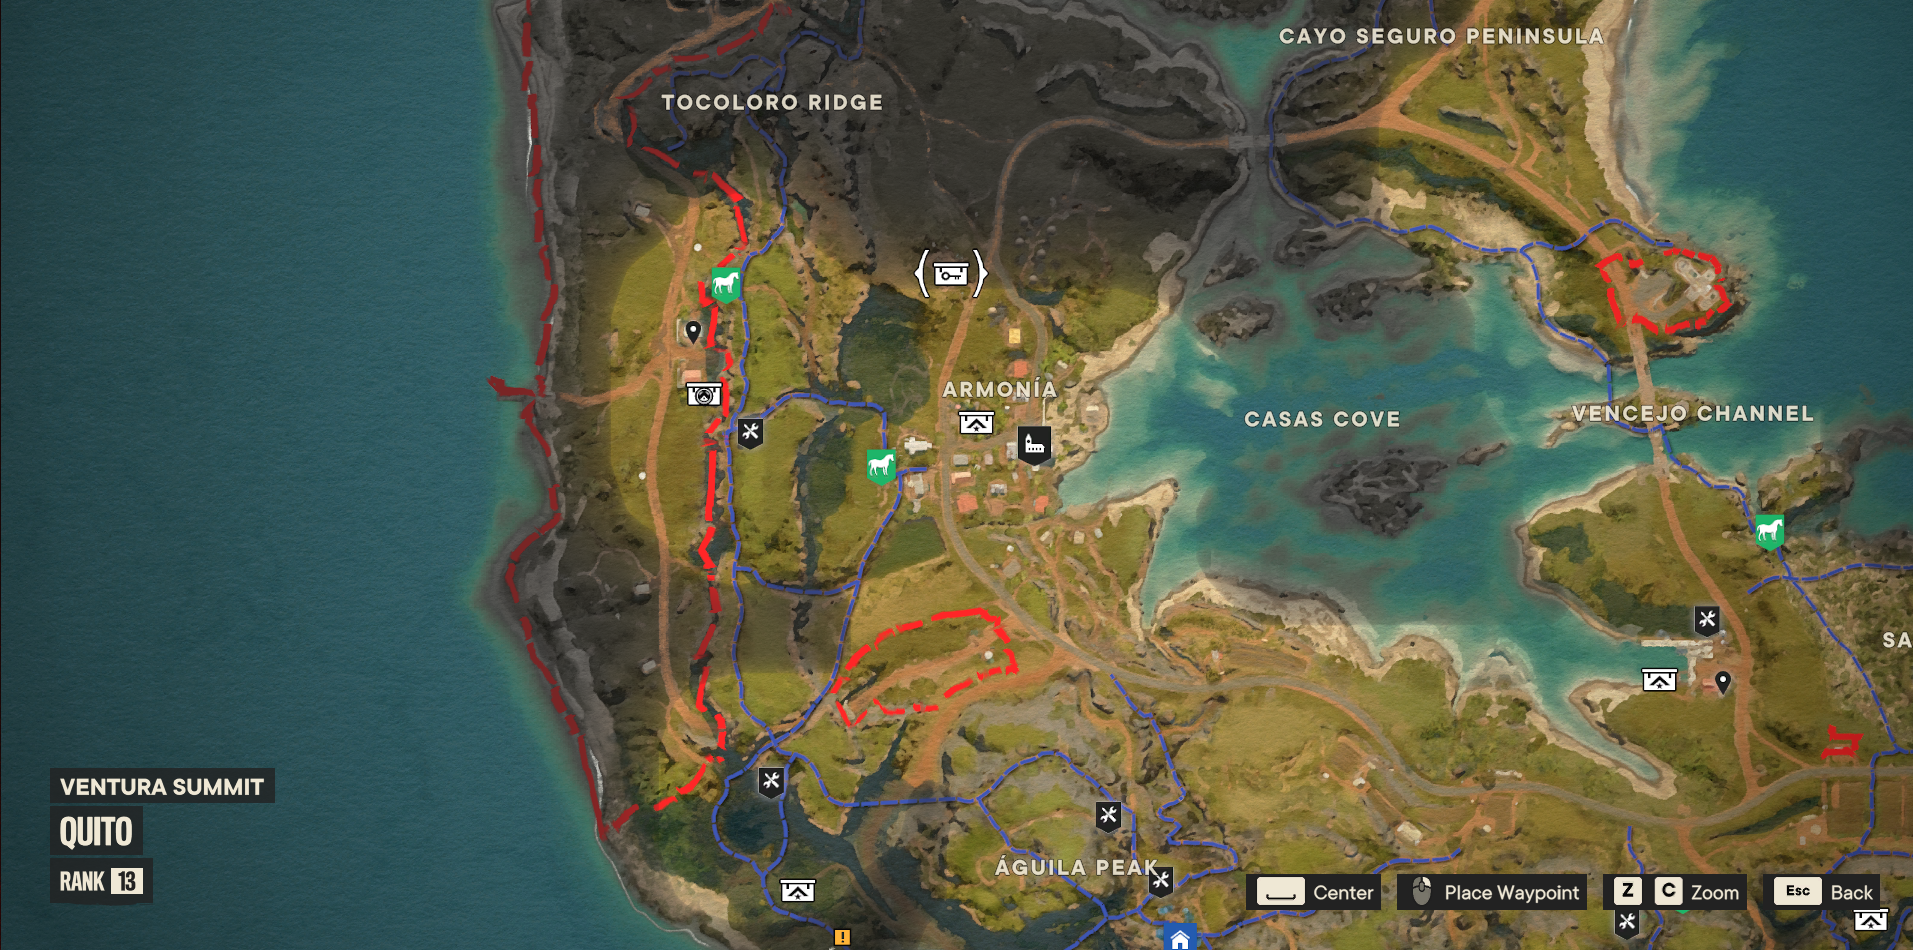
Chest #2
Location: The chest is on a small tower at El Dorado Cabins, on the south coast of Madrugada.
Reward: Rioter Boots MK II (armour-piercing defense buff)
Chart Location: The #22 Dog chart is at the southernmost tip of the peninsula on the map. The #03 Pig is on a small islet to the southeast of the cabins.
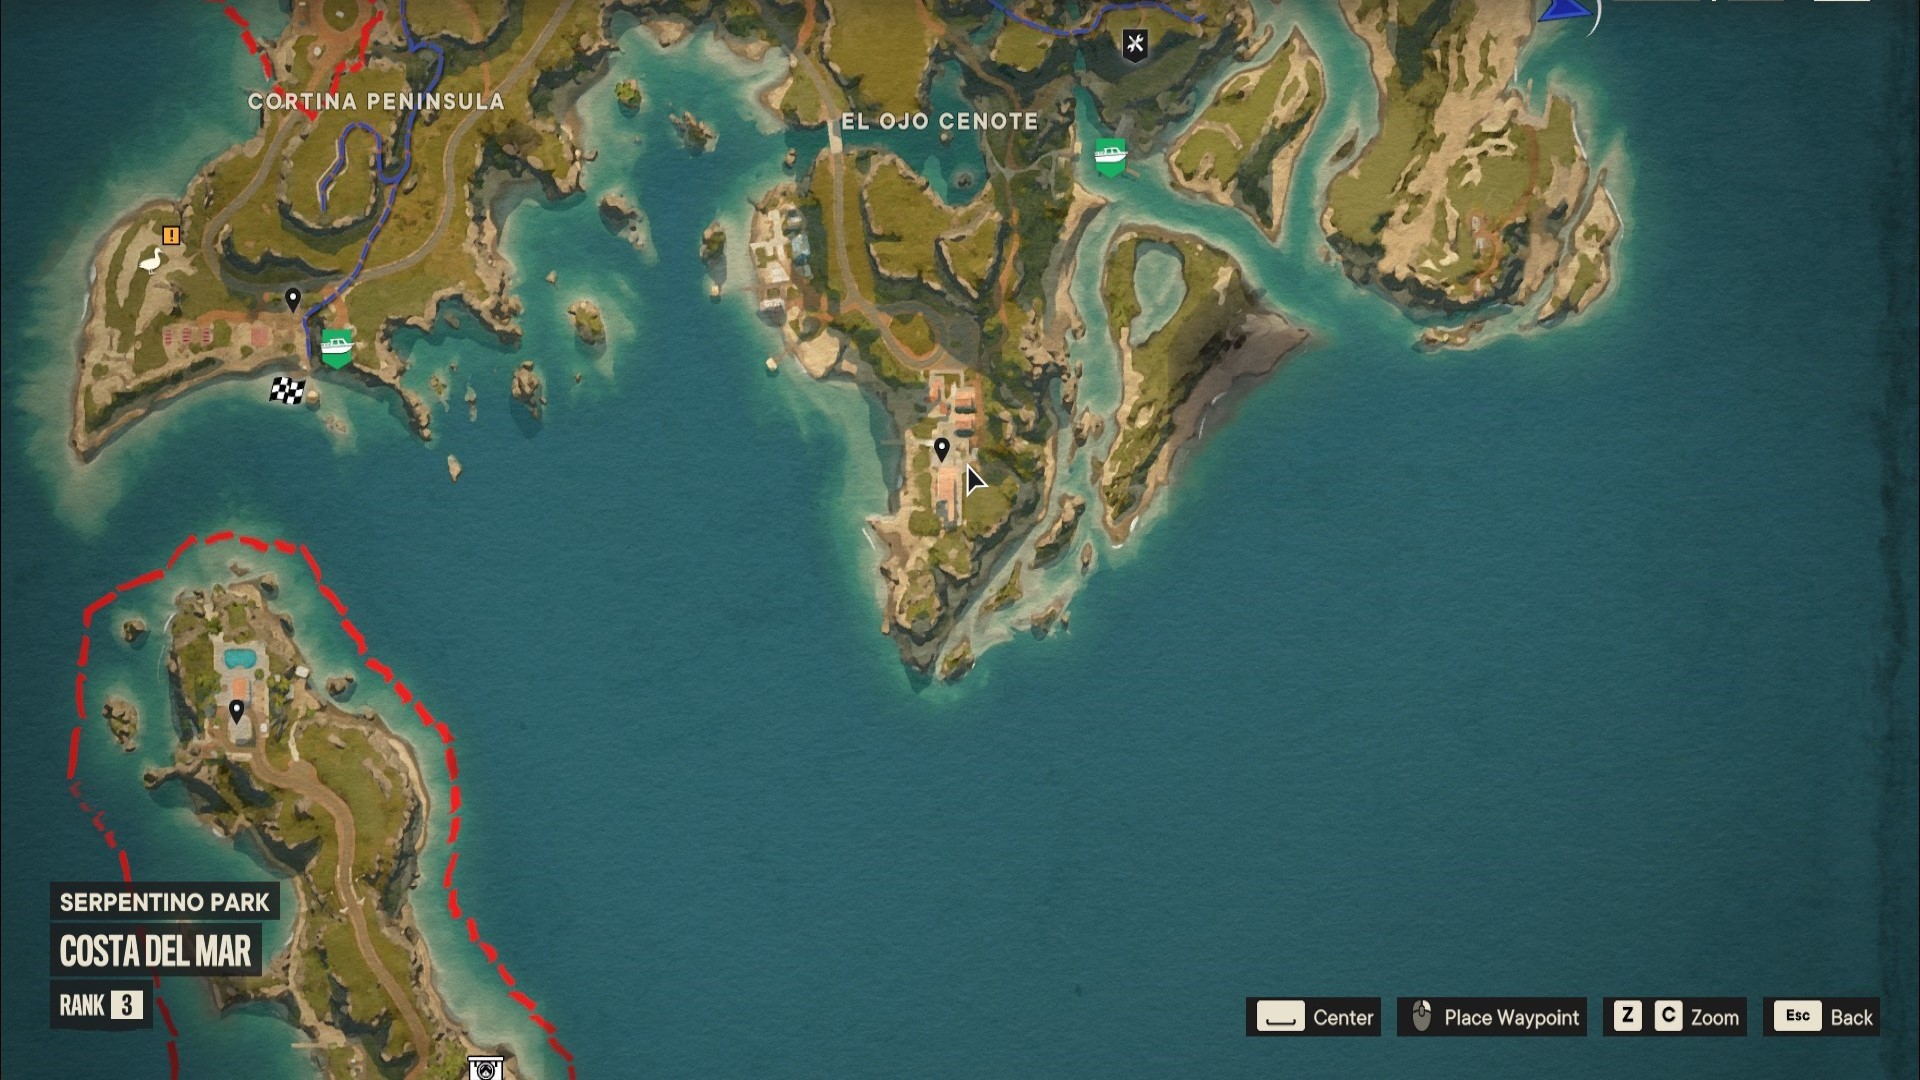
Chest #3
Location: On a pier in the small town of Poesia, in northwest Costa Del Mar.
Reward: Rioter Gloves MKII (improves melee damage).
Chart Location: The #25 Yara Libre chart is on the rock in the distance, directly ahead of the pier. The #10 Rooster chart is at a beach that’s south along the west coast of the small island. Use your grappling hook to climb up the grapple spot to find it.
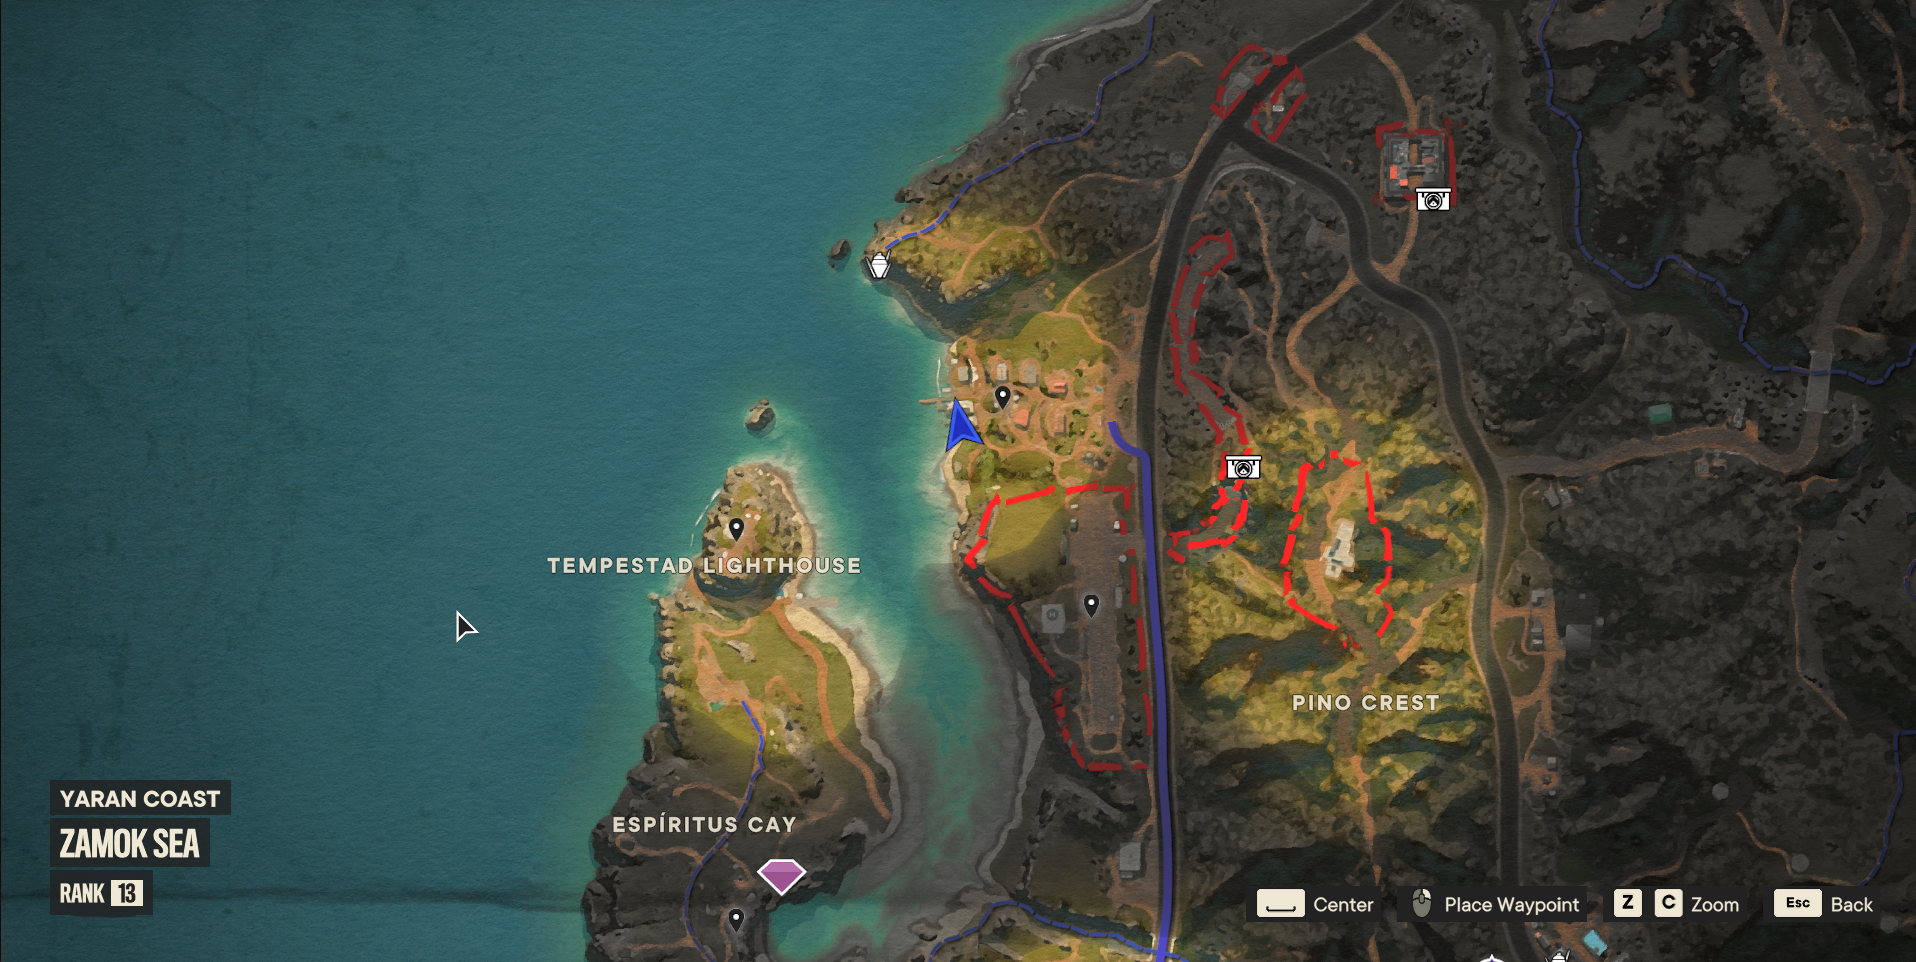
Chest #4
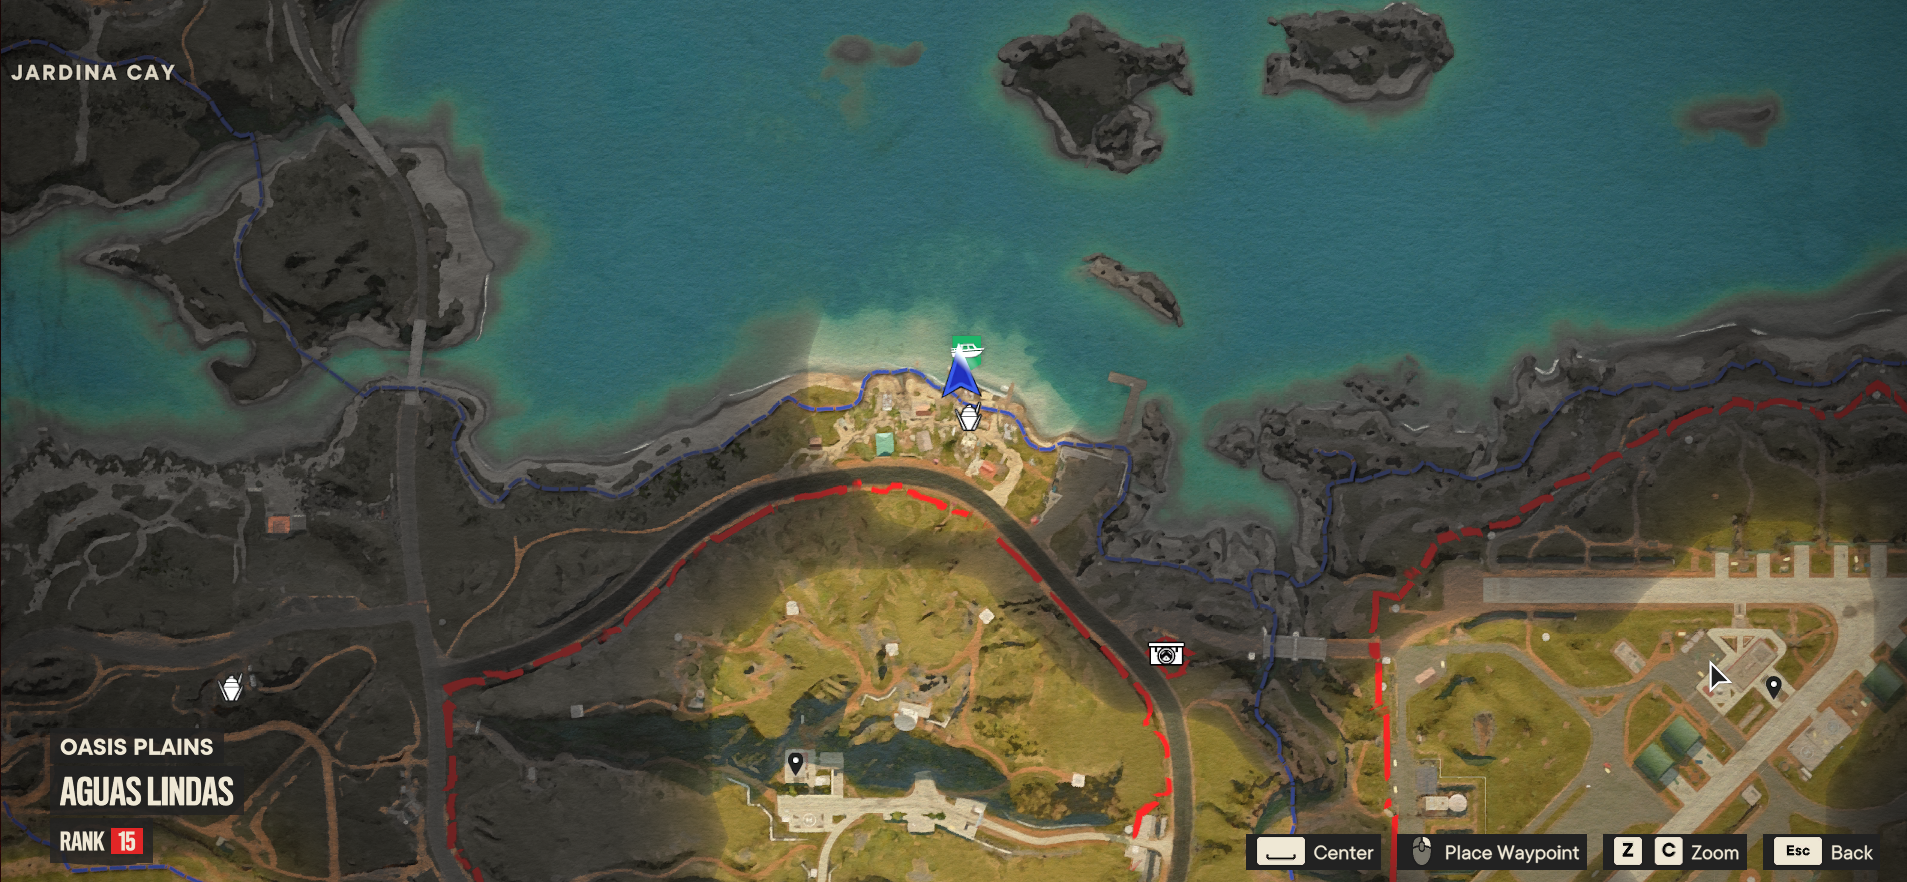
Location: It’s at the pier of a coastal village in Aguas Lindas, north of Ida’s Refuge.
Reward: Rioter Vest MK II (armour-piercing and blast defense buff).
Chart Location:Â See the big island north of the coastal village? The #28 Yaran Queen Butterfly chart is on the southern cliff of that spot. After that, head east from the butterfly to the smaller island with the broken pier.
The #12 Shark chart is underwater; dive into the water by the pier. Head to the deepest plank you can see. Just watch out for sharks.
Chest #5
Location: The chest is on top of a billboard in north Verdera in the centre of Lozania.
Reward: Rioter Helm Mark II (armour-piercing defense buff).
Chart Location: Head south across the rooftops following the blue marks to find #16 El Trompo. Then, head further south for the #19 Sunrise Mariposa Flower chart.
Chest #6
Location: Head south of Feroza in Balaceras. The chest is in a fenced yard with shipping containers and dismantled cars.
Reward: Fuego Mitts MK II (fire defense buff).
Chart Location: The #04 Starfish chart is pinned below the steering wheel of the car directly at the end of the zipline. The #23 Libertad Emblem is in an open yellow container blocking the entrance.
Chest #7
Location: In a watchtower that’s northwest of Segunda in Cruz Del Salvador.
Reward: Fuego Helmet MK II (improved damage to burning enemies).
Chart Location: The #29 Soursop chart is hidden in a manhole just to the southeast of the field. The #13 Cat chart is hidden in the north-east manhole.
Chest #8
Location: At the base of a flooded tower, east of the big dam in Noventarmas.
Reward: Fuego Boots MK II (high fire defense, impaired movement noise)
Chart Location: The #26 Boxing Glove is in a smaller tower within the area filled with crocodiles. The #9 Tarantula is at the top of the flooded tower.
Chest #9
Location: Southeast of Ruben in Barrial.
Reward: Fuego Panks MK II (increases fire defense).
Chart Location: The #20 Mamey Sapote chart is under a pier to the northeast. The #17 Coin is in a cave southeast from the chest around the cliffs. You’ll find a bunch of orange netting nearby; shoot the netting to open the entrance to the cave.
Chest #10
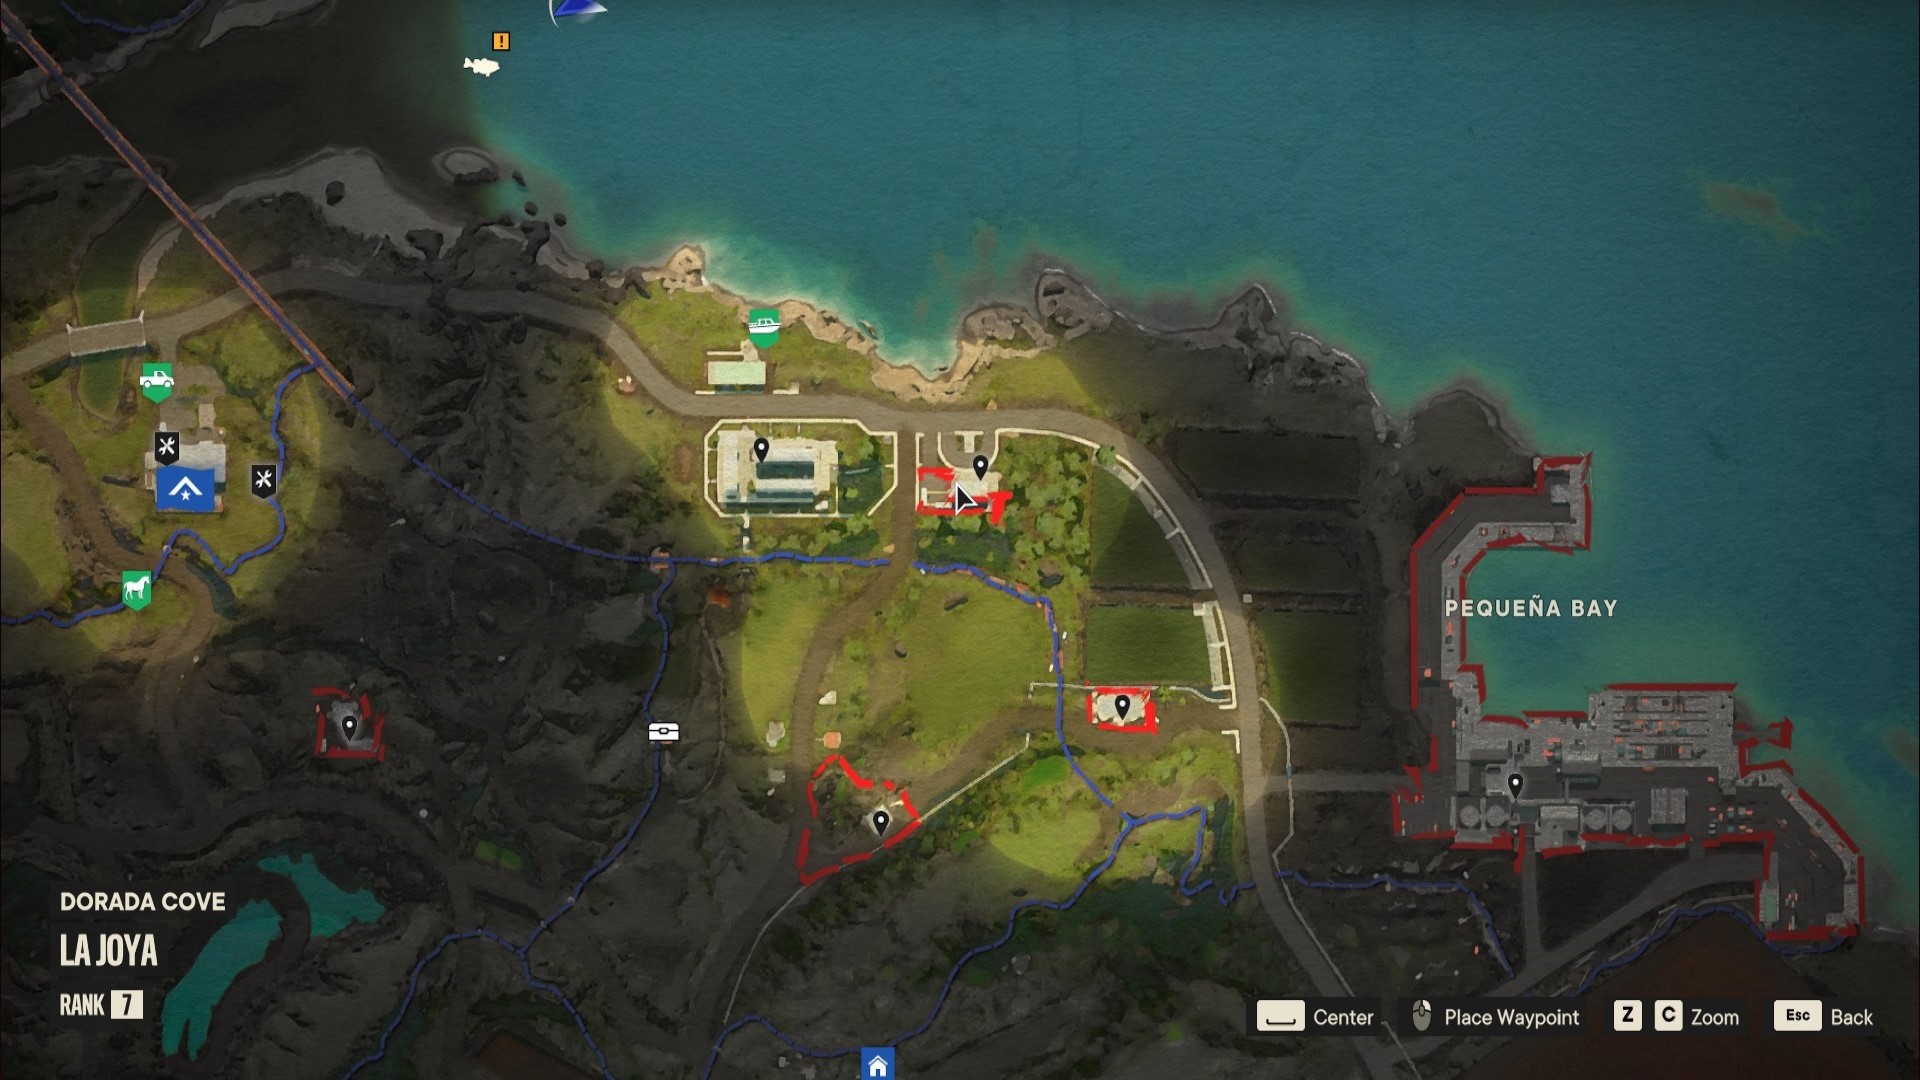
Location: On the roof of the People’s Pride Clinic in north La Joya; you’ve done a story mission in this area before.
Reward: Hazmat Pants MK II (poison protection buff)
Chart Location: The #18 Cigar is in a north apartment building roof within the clinic area. The #21 Croco Taxi is on the north building’s roof (by the water), right after finding the Cigar chart.
Chest #11
Location: On the pier of the fishing village Barriga in north Sierra Perdida.
Reward: Hazmat Suit MK II (improved poison and fire defense)
Chart Location: The #14 Horse chart is in a boathouse with a broken pier that’s across the lake from the Barriga fishing village pier. The #30 Domino chart is in another boathouse at the western end of the lake.
Chest #12
Location: On a roof of a shack in Sierra Perdida, north of Savannah Fields.
Reward: Hazmat Mask MK II (improves poison defense)
Chart Location: The #07 El Crocodilo chart is in a southwest flooded shack. The #27 Tocororo chart is south of the chest in a low-walled open building.
Chest #13
Location: On a rooftop in northwest Concepcion in Conuco (the curfew city in the story).
Reward: Hazmat Shoes MK II (greatly improved poison defense but impairs movement)
Chart Location: The #24 Chalice is in a store north of the market square area. The #05 Machete chart is in the auto-shop with a unique weapon box that’s east of the store with the Chalice chart.
Chest #14
Location: On a rooftop just north of La Divinidad Cathedral in Old Pueblo, Esperanza.
Reward: Rioter Pants MK II (improves armour-piercing defense)
Chart Location: Head along the rooftops to the right at the cathedral, then jump over to the cathedral balcony to find the #11 Rum chart. After that, go inside the cathedral and head to the balcony east. Then use the plank to jump from the cathedral to the rooftop; you’ll find #02 La Guitarra.
Chest #15
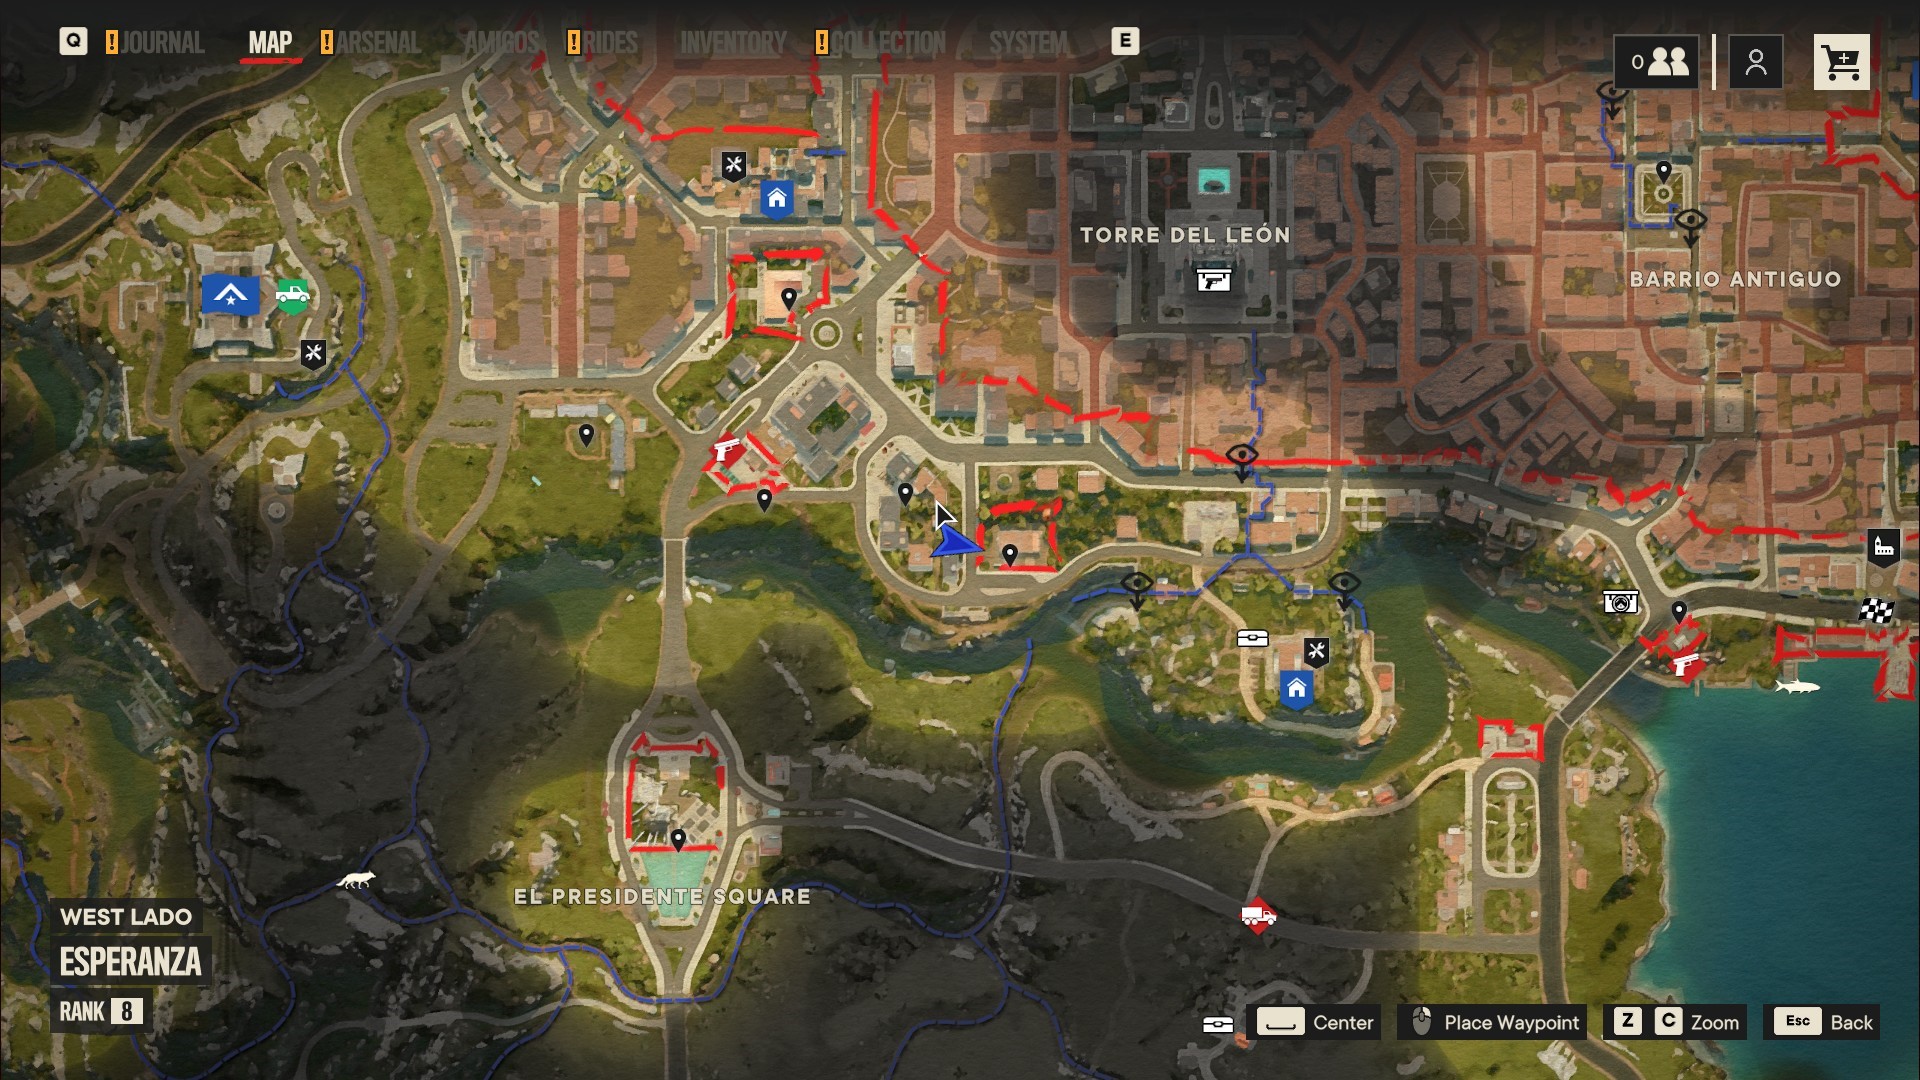
Location: At the southern outskirts of Esperanza at the Siete Pajaros Apartments. It’s northeast of El Presidente Square.
Reward: Fuego Coat MK II (improved fire and poison defense).
Chart Location: The #08 Car Clasico chart is up the roof of the apartments and south. The #15 El Flamenco is near a spot with a zipline leading to it, filled with vines.


Leave a Comment