

Write what you are looking for and press enter to begin your search!

Live News

Shin Megami Tensei 5 Miman Guide: How To Find Them All
In the new JRPG Shin Megami Tensei 5, there’s a creepy-ass shopkeeper called Gustave who asks you to seek out his army of Miman, little red imps that are scattered all over Da’at.
Yes, Atlus is resorting to the time-tested collectables sidequest where you find these creatures to get rewards, much like the owls from Tales of Arise. For each Miman you find, you will earn a small amount of Glory that you can use to spend on the game’s Miracles. Find multiples of 5 Mimans, and you’ll get big rewards.
There are four major regions in SMT5 where you can find these Mimans: Minato, Shinagawa, Chiyoda, and Taito. And there are 200 Mimans to find, with 50 of them in each region.
If you need some help, there’s a Cironnup (tiny dog with dog mask and bow-and-arrow) in each region who can help mark all the Mimans on the map. Of course, it’ll cost you Macca. Here are the locations of each Cironnup.
Here are the locations of the Mimans in each region.
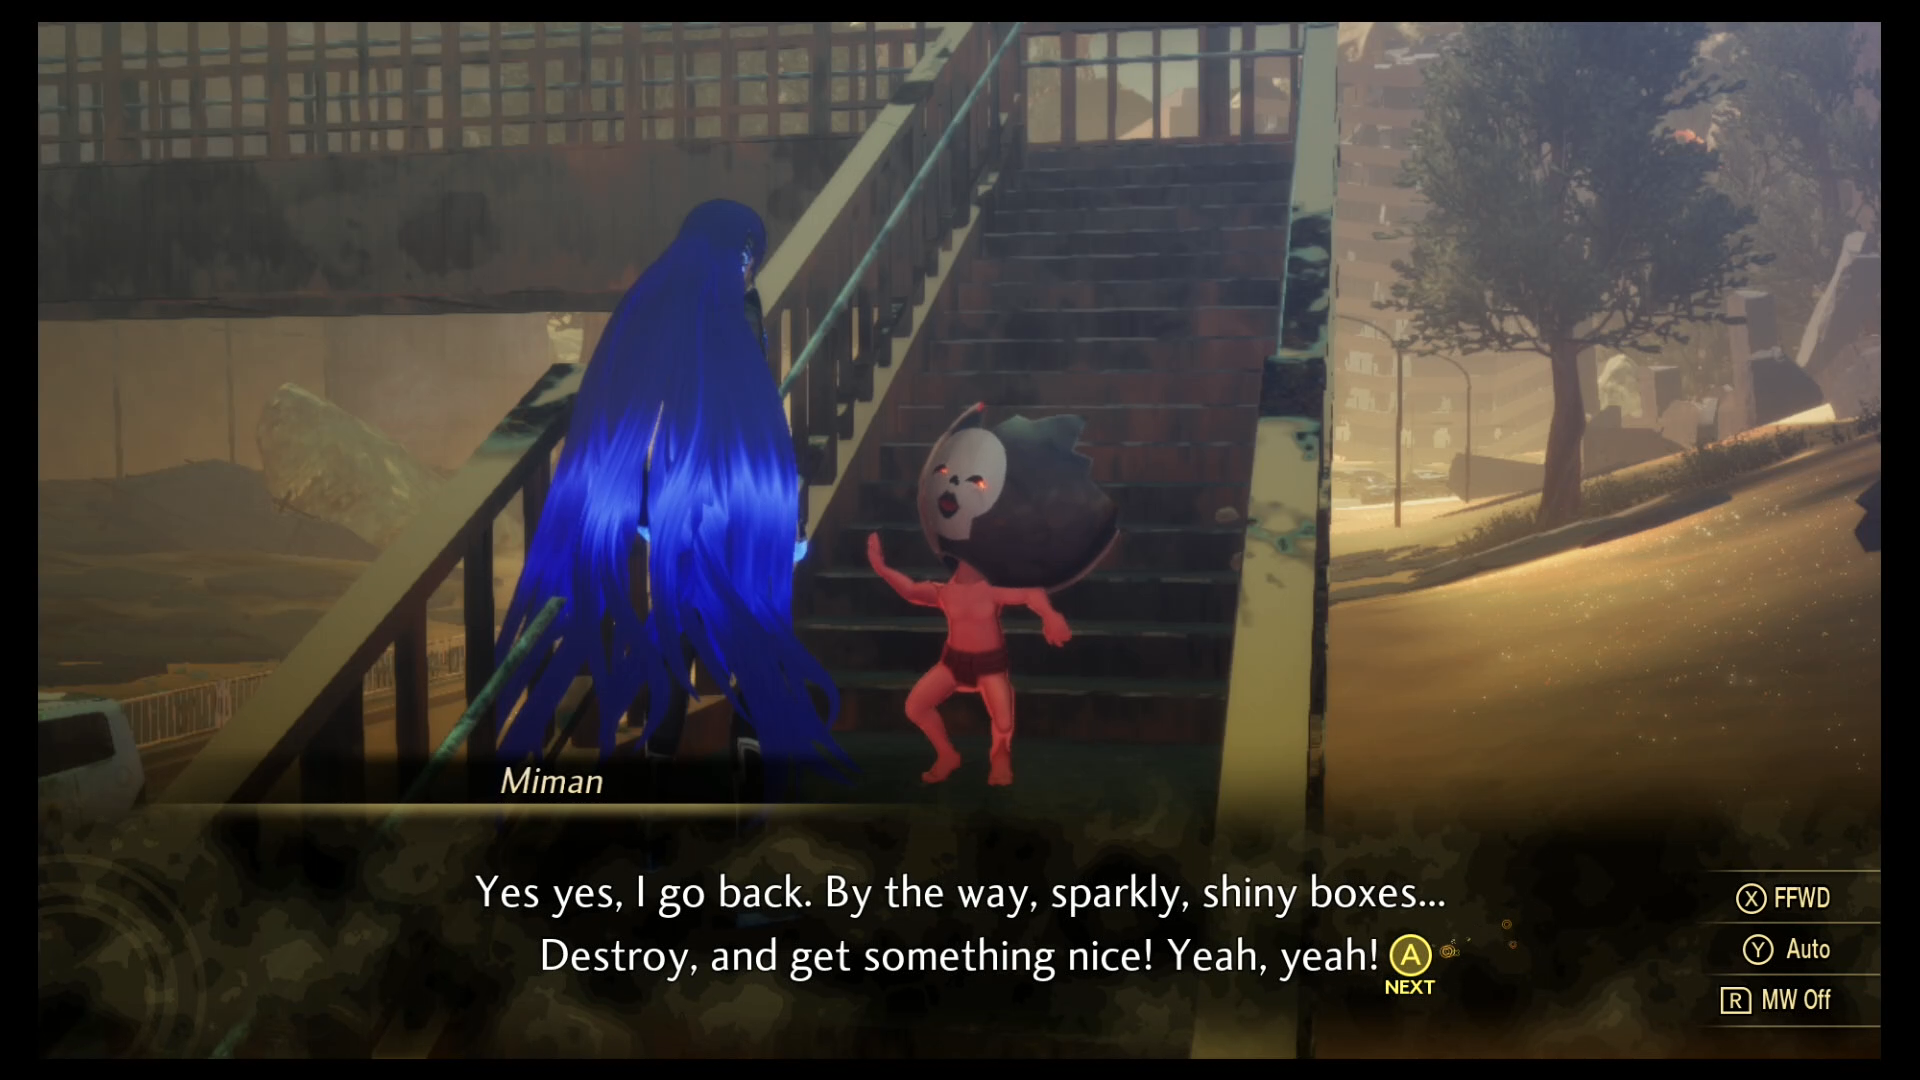
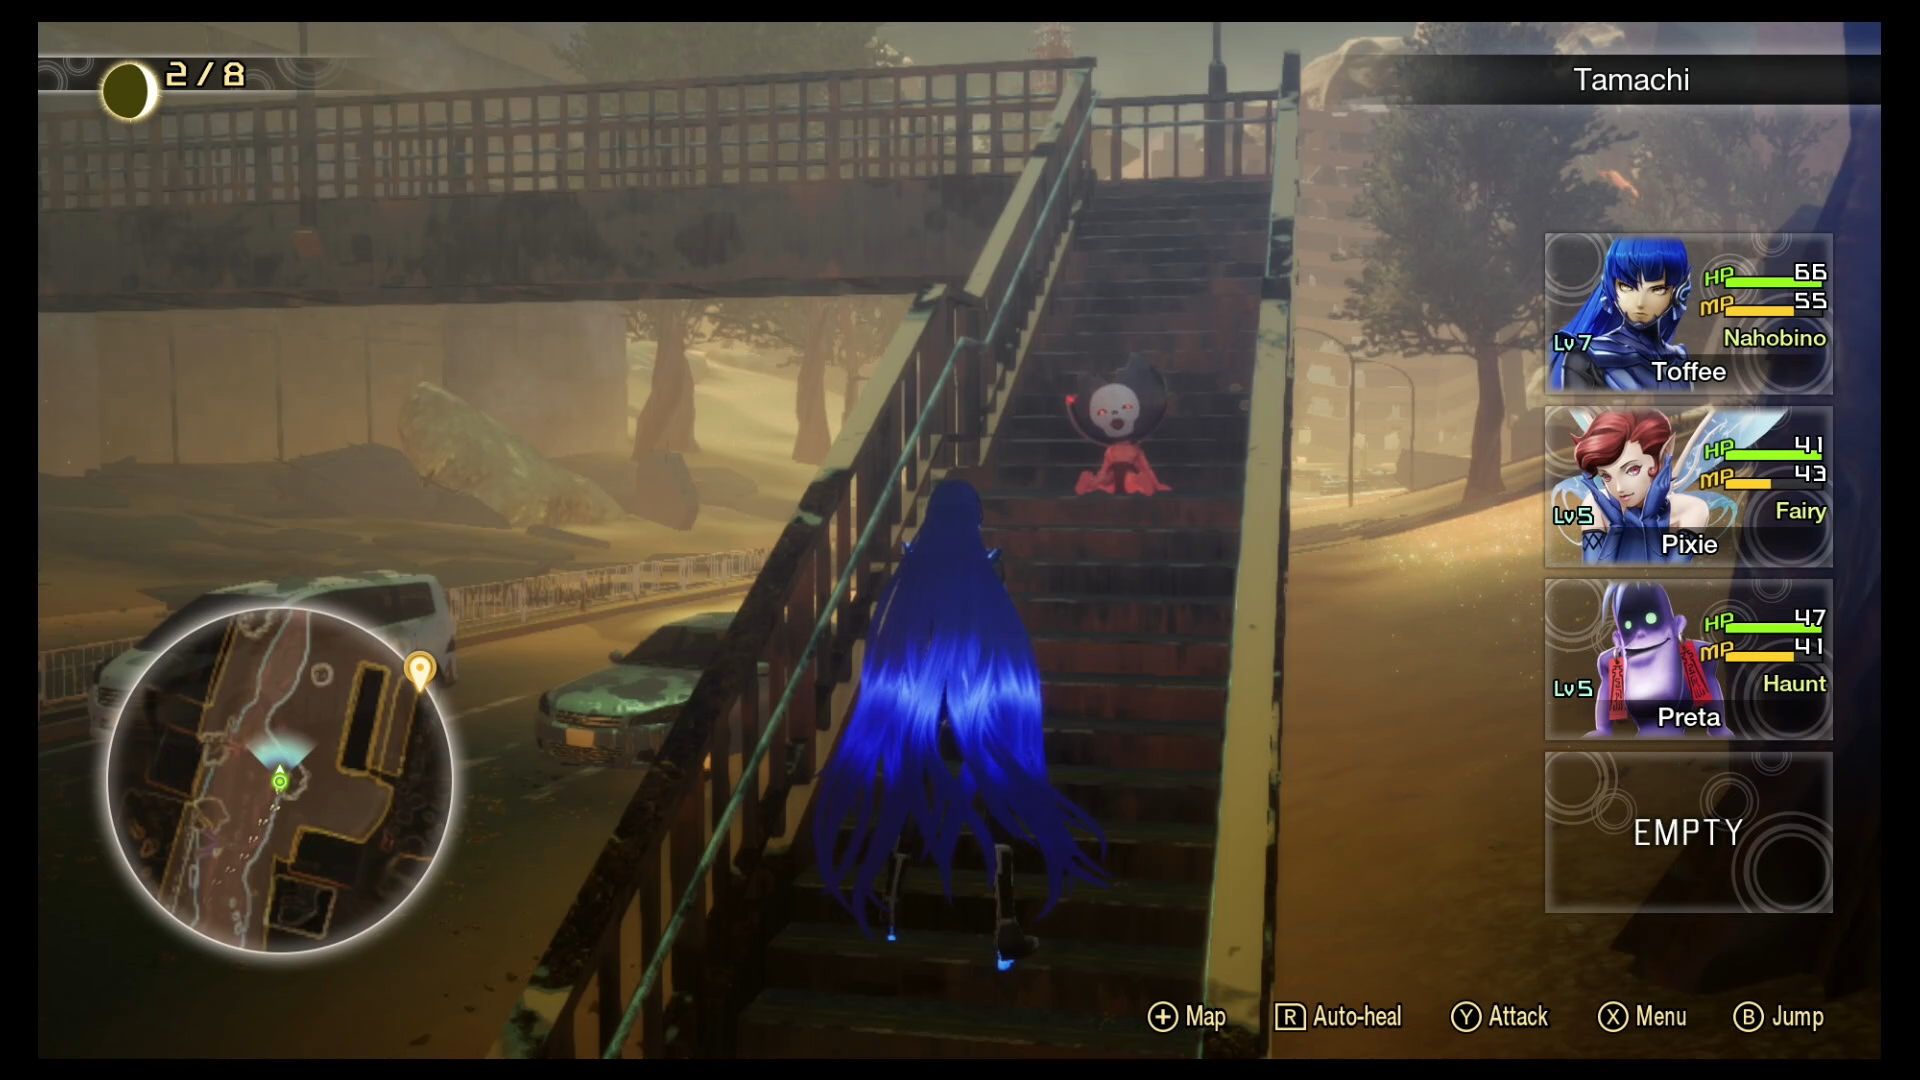
Miman #1: This one’s right in front of first Leyline Fount (named Tamachi) in Netherworld.
Miman #2: Next one’s on the stairs a bit north of the first Miman, on the east side of the road, still in Tamachi.
Miman #3: This one’s still in Tamachi. Take the west fork that is leading to a dead end. About halfway down the fork, on the east side alongside the road; check the west fork, behind a rock.
Miman #4: This Miman is in a ruined building on the east side of the west fork, slightly ahead of the previous Miman.
Miman #5: After Miman #4, head further down the road on the west side, up in a building.
Miman #6: Right above the Mita Leyline fount, use the crossing bridge to reach him.
Miman #7: This Miman is behind the Pixie’s Essence chest in the dead-end south of Mita Fount.
Miman #8: This Miman is up on a cliff after defeating the bosses of the first Abscess (the giant red eyeball barrier thing blocking your way).
Miman #9: After meeting a plot character near the train, head to the dead-end to the southwest. The Miman is right next to a rock.
Miman #10: This Miman is behind the train, under the tunnel.
Miman #11: This Miman is in a corner west of the Shiba Leyline.
Miman #12: This Miman is southwest of the giant Oyamatsumi (golem) in the Shiba Leyline area.
Miman #13: The Miman is southwest of the Hamamatsucho Leyline, near the path upwards the broken highway.
Miman #14: The Miman is near the climbing platforms between Shiba and Hamamasucho. It’s underneath the rubble on the bottom.
Miman #15: This Miman is on a rock high up on the waterfall within the Hamamatsucho area. You can jump down from above to get to it.
Miman #16: Head down the path to the north after the previous Miman, on the left side of the road as you head up. You’ll find the Miman nearby.
Miman #17: This Miman is hiding behind a rock in a path upwards, right after finding the previous Miman.
Miman #18: This Miman is southwest of the Hamamatsucho Leyline. Follow the highway uphill to the far southwest until you hit a dead-end.
Miman #19: This Miman is along the stream in the Hamamatsucho area, just on the upper pathway.
Miman #20: This one’s near near Leanan Sidhe for the Spirit of Love quest. It’s up the river from the previous Miman.
Miman #21: The Miman is located at the far southeast dead-end from Hamamatsucho Leyline, in a building structure on an upper level.
Miman #22: Head northwest of the Tokyo Tower; the Miman is right there.
Miman #23: The Miman is nearby the collapsed highway structure far south of the Tokyo Tower.
Miman #24: The Miman is at the area south of Tokyo Tower, just a bit past the previous Miman, in the abandoned building.
Miman #25: Keep going to the ruined city area of the previous Miman; you’re basically heading to Shiba. The Miman is up on the second floor; jump up to it.
Miman #26: The Miman is tucked away in the Mermaid cave area west of the previous few Miman. It’s where you fought Pazuzu for the “The Cursed Mermaids” quest.
Miman #27: Follow along the wall to the northeast of Tokyo Tower. You’ll come across the roof of an abandoned building. Look down below the hole in the roof; the Miman is right below.
Miman #28: Down the path from the previous Miman, fall down the hole in the building you come across. The Miman is at the ground level.
Miman #29: The Miman is southeast from Kamiyacho Leyline, in the broken buildings near the edge of town.
Miman #30: The Miman is southwest of the Kamiyacho Leyline. Climb up the platforms to find it.
Miman #31: Head further southwest of the Kamiyacho Leyline in a broken-down building. Head to the middle level; it’s right there.
Miman #32: Head to the building close to Koumokuten, which is southwest of the Kamiyacho Leyline.
Miman #33: At the west of Kamiyacho Leyline, near a corner at the vending machines and traffic lights.
Miman #34: The Miman is northwest of the Kamiyacho Leyline, in a broken building. Head up on a red platform to get to it.
Miman #35: Climb up on a bridge much further down northwest of the Kamiyacho Leyline via the red platform. The Miman is at the north dead end.
Miman #36: Follow the bridge in Kamiyacho all the way to the end to the east. The Miman is right there.
Miman #37: This Miman is northeast of the Kamiyacho Leyline, at the end of a road dead-end on a sand dune, south of the previous Miman. If you see lots of Magatsuhi orbs on the road, you’re on the right track.
Miman #38: Go along the northeast road from the Kamiyacho Leyline until you reach the vending machines on the western side of the road. The Miman is just nearby past the machines.
Miman #39: The Miman is located north of Kamiyacho fount, past the denser city area, in a corner near an open wall.
Miman #40:Â The Miman is near the Petrified Baphomet demon, which is on the path west of Onarimon Leyline. The Petrified Baphomet will give you and your demons a free level up, so go ahead and activate it when it’s appropriate.
Miman #41: From the Onarimon Leyline, go towards Tokyo Tower. Then jump down to find this Miman on a cliff.
Miman #42: Close to where you receive the Gold Dragon’s Arrival quest, jump the gap to the southwest. The Miman is near where you land; it’s overlooking Tokyo Tower from a ledge.
Miman #43: In the same area where you jumped to, head to Anahita’s location. There’s a path to the left where the Miman is.
Miman #44: From where you get the Jatayu egg for ‘The Ultimate Omelette’ quest, head behind and to the right of the nest to find this Miman sitting and a rock on the cliff.
Miman #45: After meeting the Angel in the western Kamiyacho area, head to the path south of there, drop down, behind a rock.
Miman #46: Continue on south from the previous Miman, behind a building.
Miman #47: Climb up the blocks from the previous Miman, and turn left. The Miman is right there.
Miman #48: Within the Nagatacho area, from where you completed the ‘Movin’ on Up’ quest, continue down the path, climb up the block, and head to the right. The Miman is nearby.
Miman #49: This Miman is on top of the Diet building, in the centre in front.
Miman #50: Head to the back of the Diet building. The Miman is chilling right there.
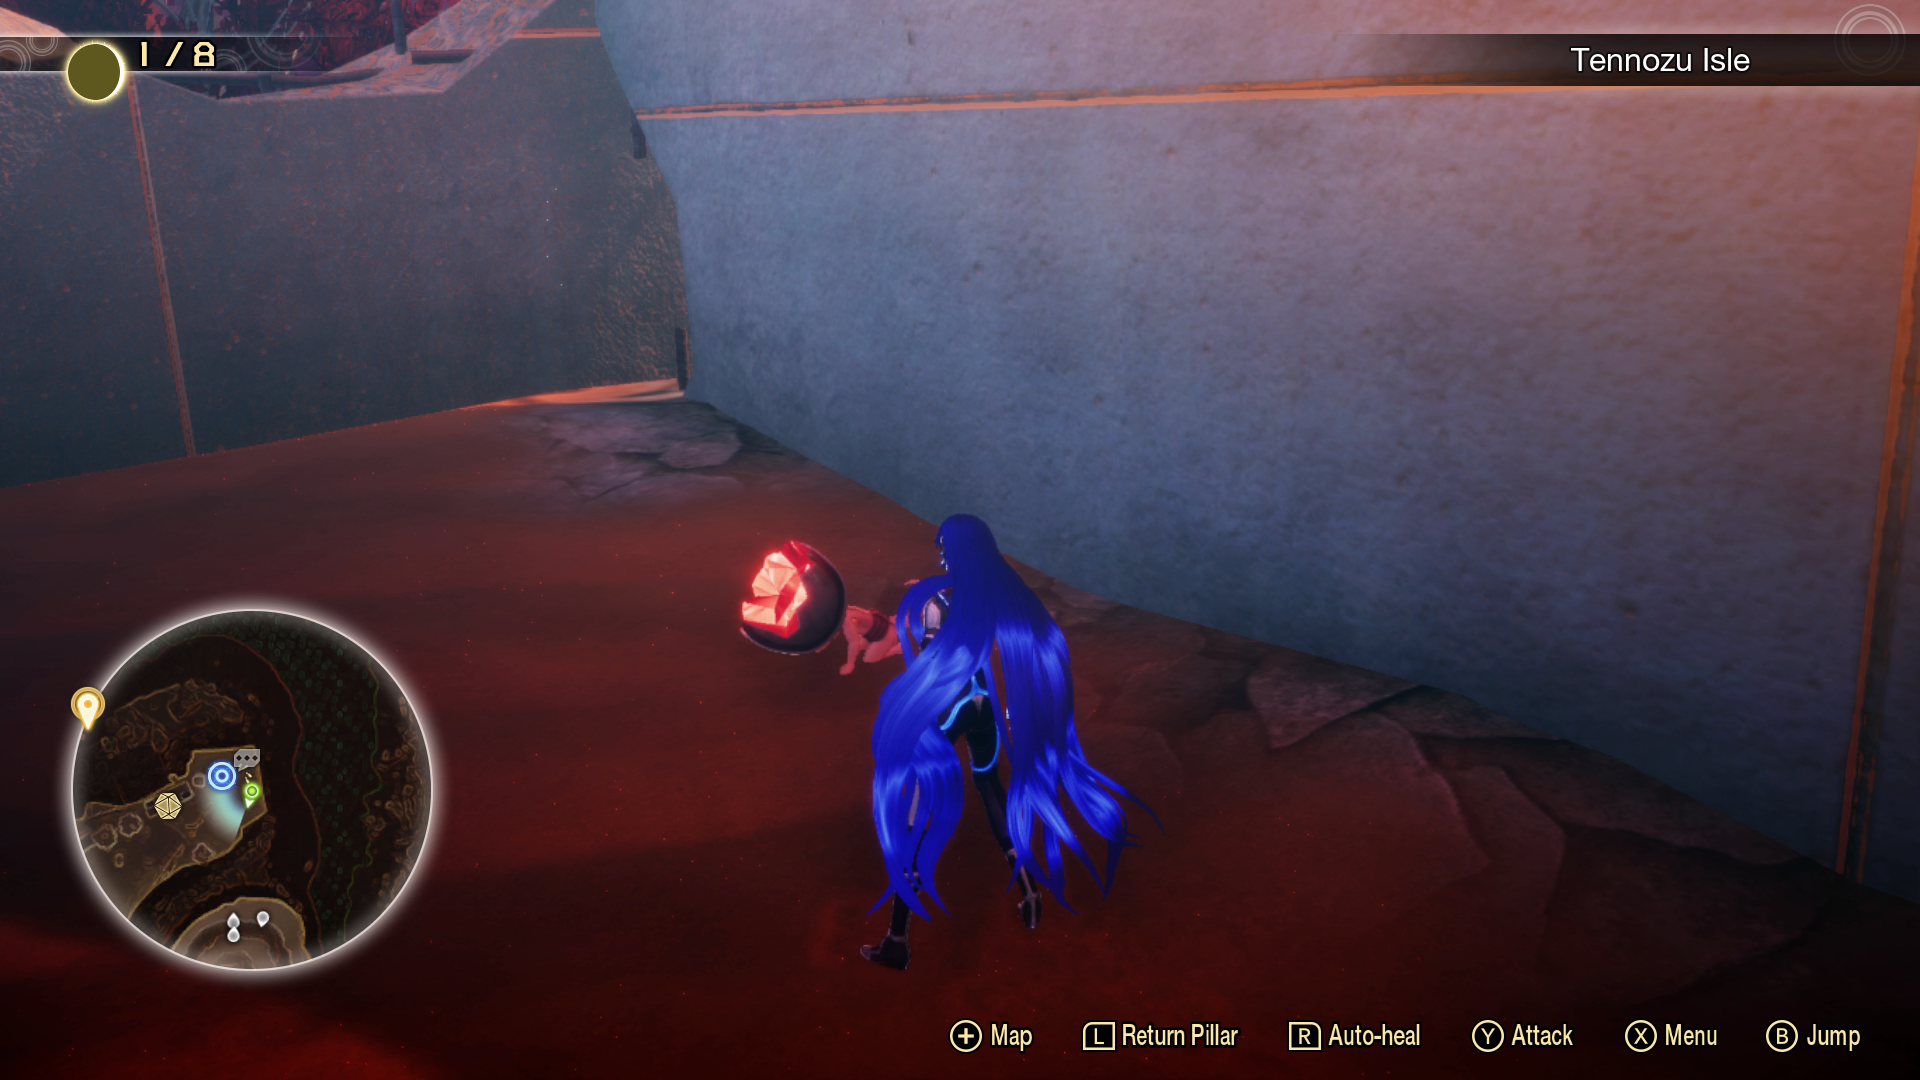
Miman #1: The Miman is near the first Leyline in the zone; specifically the Tennozu Isle Leyline.
Miman #2: The Miman is on the elevated tracks west of the Tennozu Isle Leyline, at the north end.
Miman #3: Head northwest of the Tennozu Isle Leyline, just west of the previous Miman. It’s hanging out near a chest and sitting on a concrete block.
Miman #4: Head southwest from the previous concrete-chilling Miman. Head to the top of a roofed road west of the Tennozu Isle Leyline at the corner of the road. This Miman is on the northwest side of this section.
Miman #5: This Miman is standing on a cliff southwest of the Tennozu Isle Leyline. From the last Miman, you can run to the northeast and see it close to a tree.
Miman #6: The Miman is on the top floor of a building west of the Tennozu Isle Leyline. You’ll have to jump on some platforms to get to it.
Miman #7: The Miman is southwest of the Tennozu Leyline (not the Isle). Climb up to the upper ledge where it’s on the tilted sides of the fallen buildings in the vicinity.
Miman #8: Climb up the nearby red platforms close to the Tennozu Leyline. Walk on the roofed bridge to right; the Miman is waiting at the end.
Miman #9: Head south of the Tennozu area, where there’s a road that leads to a dead end. The Miman is close to the end.
Miman #10: From where the previous Miman was, head to the end of the same highway on the ground floor. The Miman is overlooking a ledge to the east.
Miman #11: The Miman is at the end of the bridge southeast of the swirling mountain in the Tennozu area, north side.
Miman #12: The Miman is on top of a bunch of shipping containers overlooking the Shinagawa Pier Leyline, westward.
Miman #13: Head north of the Shinagawa Pier Leyline, up to a dead-end at the end of the railroad tracks. The Miman is underneath the tracks nearby.
Miman #14: The Miman is on top of the high-speed train northwest of the Shinagawa Pier Leyline.
Miman #15: Head east from the Shinagawa Pier Leyline; you’ll come across a Principality demon and a bunch of shipping containers near it. The Miman is sitting nearby on the southeast side.
Miman #16: The Miman is on top of the shipping containers near the Abscess to the far northeast of the Shinagawa Pier Leyline. You’ll also find a giant Petrified Hecatoncheires for leveling-up bonus purposes.
Miman #17: The Miman is the warehouse directly south of the Container Yard Leyline. You need to drop in from the roof to approach it.
Miman #18: From the Container Yard Leyline, head northwest on top of the warehouses, north of the Shinagawa Pier Leyline. The Miman is in the far north building; get to it by entering from the top. You’re at the right spot if you see a chest nearby as well.
Miman #19: This Miman is in the Container Yard area, in the eastern-most vertical row of warehouses.
Miman #20: This Miman is in the Container Yard, in the topmost warehouse. You’ll find a Nekomata demon as well.
Miman #21: Within the shipping container area, be sure to trigger a conversation involving one of your associates contacting you about the demon Lahmu. Then just head onward to the nearby bullet train. The Miman is behind the bullet train on the long road north of the shipping container area.
Miman #22: After finding the previous Miman, head down to the south and under the highway. The Miman is nearby.
Miman #23: This Miman is just northeast of the Konan 3rd Block Leyline.
Miman #24: This Miman is standing on a bus northwest of the Konan 3rd Block Leyline.
Miman #25: After finding the previous Miman, head to the north building, nearby the Konan 3rd Block Leyline.
Miman #26: Head bit west of Konan 3rd Block Leyline; there’s an NPC Oni. Head south from him, to where the Kelpies appear. As you are heading south to this new area, take an immediate left when you can. This Miman is tucked away in a corner under a highway, at the north end of said highway. This area will have a nearby Abscess you can use as a temporary landmark.
Miman #27: Near the previous Miman, head up the same tilted highway towards the north. This Miman is near a tree at the top. On the world map, this is southwest of the Konan 3rd Block Leyline and north of several climbing points.
Miman #28: On the map where the three climbing points are near the previous Miman, head under a bridge just to the east of those blocks. The Miman is right there.
Miman #29: This Miman is on a mound that’s close to the five climbing points nearby. Climb the two south blocks first, then head north to find the Miman close to the mound and edge.
Miman #30: The Miman is west of the Mitatebashi Leyline. Find some rocks near some vending machines; it’s near the rocks.
Miman #31: From the last Miman near the Mitatebashi Leyline, fall down the small pathway to the northeast, then go north and loop around to the west. There’s a Petrified Eligor here; head south into the ruined building with the red stairs. Keep heading up, and you’ll find the Miman hiding behind a wall in the building.
Miman #32: After you find the last Miman, head to a building to the northwest. You’ll find this Miman in a room with vending machines.
Miman #33: This Miman is in the ruined building southwest of the Mitatebashi Leyline, in the second southern-most building in the region.
Miman #34: This Miman is on the roof of the parking garage east of Konan 2nd Block Leyline, to the east side.
Miman #35: This Miman is south of Konan 2nd Block Leyline, in a corner near a chest. You can drop down from above.
Miman #36: This Miman is tucked away in a tight alley between two square buildings near the very southeast part of the Konan 2nd Block Leyline. These buildings are south of the parking garage and at the bottom of a tilted building ramp.
Miman #37: Head to the north and slightly west of Konan 2nd Block Leyline. This Miman is at the top of some stairs of a skeleton building.
Miman #38: The Miman is on top of the roofed pathways southwest of Konan 2nd Block Leyline.
Miman #39: When you’re in the Gotenyama forestry area, follow the path on the north side of the forest. The Miman is along the path.
Miman #40: This Miman is at Gotenyama, near the Oni NPC on the south side across the forest pathway.
Miman #41: The Miman is at the Fairy Village, southwest of the Fairy Village Leyline near a bunch of walls.
Miman #42: This Miman is at the Fairy Village, near the waterfall and the Arahabaki demon.
Miman #43: This Miman is at the south of the Fairy Village, west of the river and bridge.
Miman #44: This Miman is at the south of the North Shinagawa Leyline, at the very end of the river.
Miman #45: This Miman is northwest of the North Shinagawa Leyline, near the trees up the hill.
Miman #46: Get to the big cliff past the Zouchouten within the North Shinagawa Leyline area. At the northwest end of the cliff, fall off to land to the Miman below.
Miman #47: This Miman is in an area east of the Fairy Village, where the climbing blocks are. Check near the big hole in the map; it’s at the east side of the hole.
Miman #48: This Miman is southeast of the Fairy Village Leyline, near one of the Apples you pick up for Idun.
Miman #49: This Miman is near the Shinagawa Station Leyline, near the traincars.
Miman #50: This Miman is east of the Konan 3rd Block Leyline. You need to beat Surt in the next region and accept the “A Power Beyond Control” quest to get to it. You may need to return to this Miman later when you’re deeper into the main story.
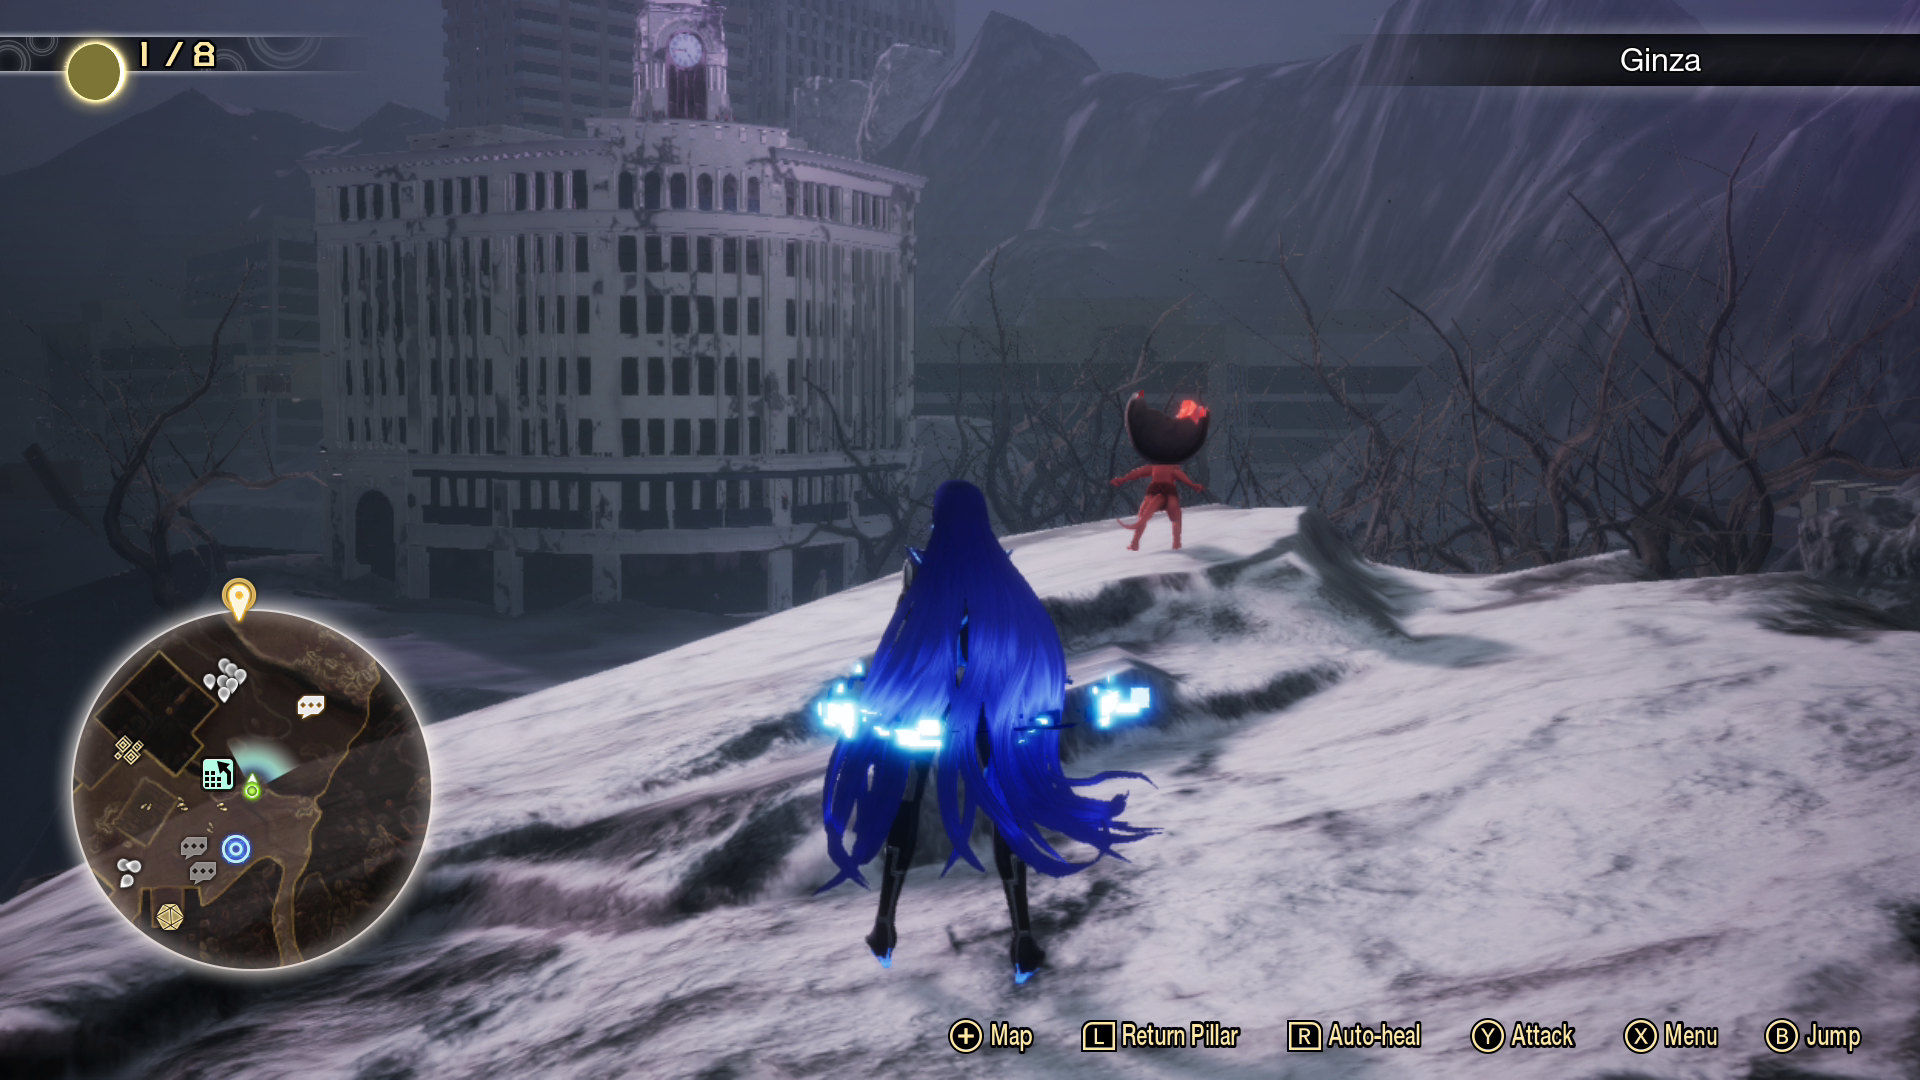
Miman #1: The Miman is right at the start of the Ginza region, standing on a rock. You can’t miss it.
Miman #2: The Miman is northwest of the Ginza Leyline, standing on a tilted building.
Miman #3: This Miman is west of the Ginza Leyline, behind the rubble.
Miman #4: This Miman is behind the Black Frost quest giver near Ginza, northwest of the Ginza Leyline.
Miman #5: This Miman is behind some vending machines west of the Ginza Leyline, near a building with three chests.
Miman #6: The Miman is hanging out at the far west of the Ginza Leyline, at a dead-end, behind a small wall.
Miman #7: Head to the roof west (and slightly north) of the Sukiyabashi Leyline. You’ll have to fall down to find the Miman, who is tucked away in a corner along the border of the map.
Miman #8: Head to the northwest cliff near the Sukiyabashi Leyline; it’s standing right there.
Miman #9: This Miman is on a rooftop to the northeast of the Sukiyabashi Leyline. This is the rooftop where the Chimera is stomping around.
Miman #10: This Miman is on the roof where Hayotaro is, east of the Sukiyabashi Leyline. It’s close to the Petrified Daemon statue.
Miman #11: This Miman is north of the roof where Hayotaro is. Use the last Miman and Petrified Daemon statue as reference.
Miman #12: This Miman is a little bit past the Nihonbashi Leyline, before crossing the fallen bridge and building.
Miman #13: Head southwest of the Nihonbashi Leyline, past the Mokoi. Then, go southwest at the fork, under a broken bridge. The Miman is right there.
Miman #14: Tucked away in a corner near a huge titled building northeast of the Nihonbashi Leyline. The Miman close to a climbing block, and a bit northwest of where Fionn Mac Cumhaill is standing.
Miman #15: Head northeast of the Nihonbashi Leyline. The Miman is the ground where the Kumbhandas are running around, near a red spike.
Miman #16: Run north past the previous Miman, climb up the block, and go left (east) of the fallen building. The Miman is right there.
Miman #17: This Miman is west of where Fionn Mac Cumhaill is standing. Look on the north side of the railroad track bridge to find it.
Miman #18: From the Awajicho Leyline, head northeast. Then across the building roof, and look in a little alcove tucked away on the ground floor in the corner bordering the northeast part of the map to find it.
Miman #19: From the Awajicho Leyline, head slightly west. Then head south, go to the ground floor, and head to the path east of all the climbing blocks. The Miman is there.
Miman #20: The Miman is on the roof just to the southeast of the Awajicho Leyline. You have to loop all the way around nearly the entire NE side of this area to get to it.
Miman #21: When on the big highway to the far east of the Awajicho Leyline (the one that leads to Akihabara Leyline), look down on the south side, slightly underneath the road. The Miman is there.
Miman #22: From the previous Miman, look south. You’ll see this Miman on a sand dune near a building and climbing blocks.
Miman #23: This Miman is a bit southwest of the Akihabara Leyline.
Miman #24: This Miman is on a raised area just east of the Nihonbashi Leyline. Getting to it is tricky though; you need to go around the entire room the long and clockwise way around, climbing up several blocks along the way.
Miman #25: From the Awajicho Leyline, go to the southwest and follow the path. Go to the tunnel underneath the Mishaguji demon NPC. When you jump off the climbing block to get to a long tunnel, the Miman is right there.
Miman #26: This Miman is in the northeast area of the room housing the Nihonbashi Leyline. To get here, from Awajicho Leyline, go to the SW, go to the tunnel underneath the Mishaguji, and after going through the long tunnel. This Miman is in a corner south of the tunnel you passed through, east of climbing blocks.
Miman #27: In the same area where the last Miman was, head to the north of the tunnel. The next Miman is just there.
Miman #28: In the same area where the last Miman was, head to the northwest. This Miman is on a rooftop you need to jump to.
Miman #29: This Miman is east of the Akihabara Leyline, near the climbing block. You have to loop around from the Leyline to get to it.
Miman #30: From the Akihabara Leyline, jump down to the northeast and head northeast again. Hug the left west wall, and turn left when you can. Head northwest, continuing to hug the left wall. Then turn left at the Jack-O’-Lantern, enter the building, and up the stairs a bit. The Miman is there.
Miman #31: From the previous Miman, climb to the top of the stairs. Head northeast around the right side of a building and keep going northeast again. You’ll find this Miman on a rooftop roughly in the centre of Akihabara.
Miman #32: From here, jump off to the northwest, and then head to the nearby north dead-end. The Miman is on the ground floor of Akihabara, to the north.
Miman #33: The Miman is located far northeast of the Akihabara Leyline, past the eastern Abscess by a tree.
Miman #34: From the Akihabara Electric Town Leyline, climb up the rubble to the SW and follow the path to find this Miman on the rooftops.
Miman #35: The Miman is behind the Ose NPC in the Akihabara area, on a dune a little bit lower than him. Start from the Mansei Bridge Leyline to get to the Miman and Ose NPC easier.
Miman #36: The Miman is northwest of the Mansei Bridge Leyline, past the climbing blocks on the ground floor, near some vending machines under the bridge.
Miman #37: From the Akihabara Electric Town Leyline, follow the path to the NE, then drop off to the ground floor. Climb up the blocks (to ones more to the south, not the far north), and you’ll find this Miman on the rooftops.
Miman #38: This Miman is on the roof west of the Akihabara Electric Town Leyline, near the Kumbhanda statue. Use the far North Climbing Blocks to get up here.
Miman #39: From the Akihabara Electric Town Leyline, go to the SW but don’t climb up the rubble, turn the left corner instead. The Miman is around the corner.
Miman #40: The Miman is underneath the broken bridge, south of the Kanda-no-yashiro Town Leyline.
Miman #41: This Miman is behind Okuninushi, past the Kanda-no-yashiro Leyline.
Miman #42: After defeating Surt near the Awajicho Leyline, move north down the path. This Miman is to the right at the end.
Miman #43: From the previous Miman, head southwest, then go in-between the climbing blocks. The Miman is right there.
Miman #44: This Miman is right after the climbing blocks hnear the previous Miman.
Miman #45: The Miman is southeast of the Tokyo Station Leyline.
Miman #46: The Miman is southwest of the Tokyo Station Leyline, past the angel NPCs.
Miman #47: From the final Abscess in Chiyoda, look off the cliff to the north. The Miman is near the northernmost point on the map, overlooking the highway.
Miman #48: This Miman is west of the Otemachi leyline.
Miman #49: This Miman is in a ruined structure that is east and far south of the Ochanomizu Leyline. check the east side of the structure.
Miman #50: If you find Ishtar, head to the far corner nearby the demon. The Miman is there.
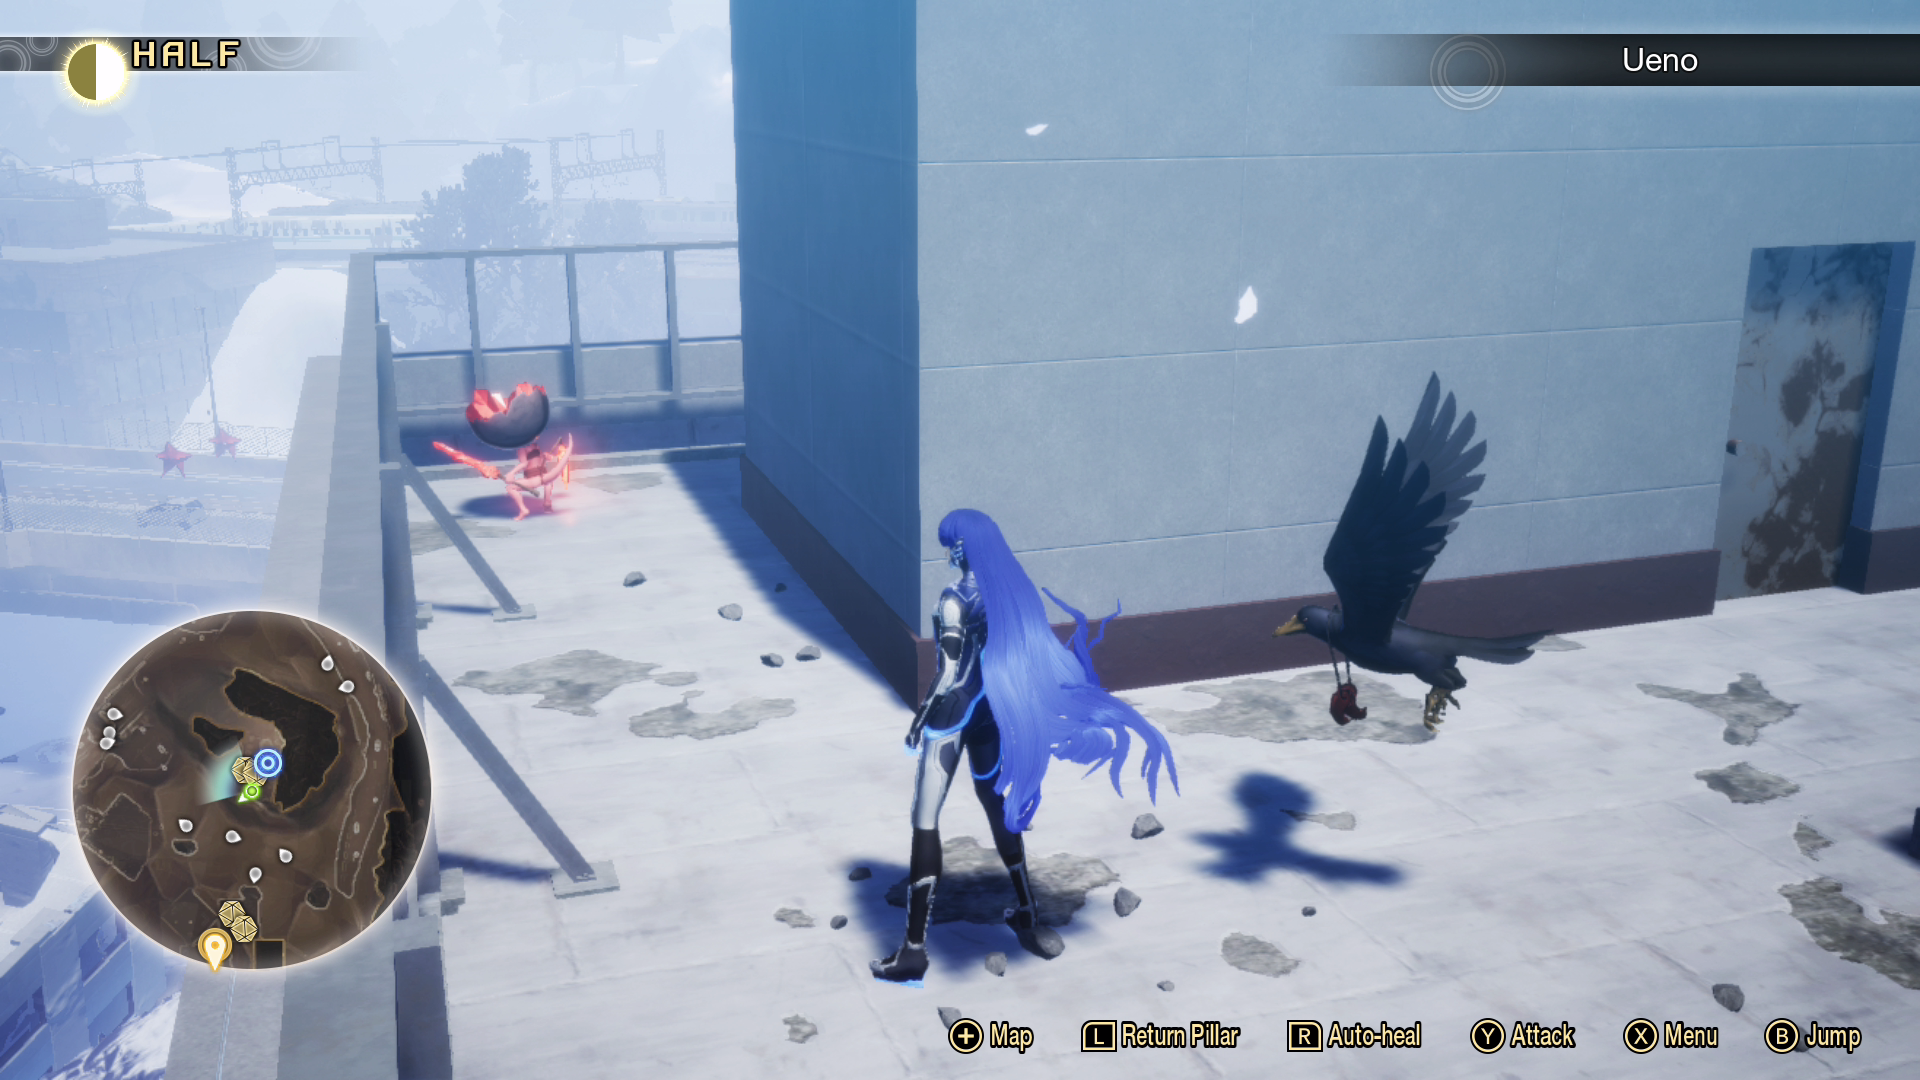
Miman #1: The Miman is right next to the Ueno Leyline on a roof.
Miman #2: From the Ueno Leyline, move south and slightly west, around the west side of the buildings. You’ll be able to head into a hole in the buildings (south of Ueno Leyline). Enter the hole and go straight; you’ll find this Miman.
Miman #3: From the Ueno Leyline, head slightly west and south down the road until you see the more open area on the right (west) side of the road. Head north just a bit from here and head west between the buildings. You’ll find a tilted building here. The Miman is on this building.
Miman #4: The Miman is located north of the Ueno Leyline, near some Hecatoncheires on a broken road near a fence.
Miman #5: From the Ueno Leyline head north and slightly east. You’ll see the petrified Eligor here; turn right from there. The Miman is at the bend in this road turning south.
Miman #6: From the petrified Eligor, go southwest into a cave entrance. This Miman is tucked away at the very end of this narrow cave north of Ueno Leyline.
Miman #7: From the Umayabashi Leyline, head North, behind a red vending machine on the path.
Miman #8: This Miman is near the Dominion Quest Giver far south of Ueno Leyline, northwest of the Asakusa Main Street Leyline.
Miman #9: From the Ueno Park Leyline, head straight south through the narrow path. The Miman is right in front of you.
Miman #10: This Miman is located in the Shinobazu Pond (northwest area of the Taito map), far to the west of the Forneus statue.
Miman #11: This Miman is in the furthest northwest part of the map. Head northwest of Shinobazu Pond on the ledge near vending machines.
Miman #12: This Miman is just west of Asakusa Leyline.
Miman #13: From the Asakusa Leyline, head west and keep going west. Drop down two levels, and you’ll find the Miman on the east side of the centre circle of the place you landed in.
Miman #14: This Miman is on the northwest side of the Asakusa area, on the second level on a block.
Miman #15: This Miman is on the bottom floor of the circular Asakusa area, near a rock on the northeast side.
Miman #16: This Miman is far to the northeast of the circular Asakusa area, near the climbing block.
Miman #17: This Miman is in the circular Asakusa area. You basically need to do a complete clockwise loop to get to the other side of the wall on the southwest side to reach it.
Miman #18: This Miman is at the far southwest section of Asakusa, near the Cironnup NPC in the southwest corner.
Miman #19: From the nearby Cironnup NPC in the Asakusa area, head southeast a bit, then drop down to the north. The Miman is nearby.
Miman #20: In the circular Asakusa area, do a full loop, fall down, follow the path south all the way, near the petrified Flauros. The Miman is just near the Flauros.
Miman #21: The Miman is at the far west of the circular Asakusa area, looking at the street to the west.
Miman #22: This Miman is in the block maze (south part of Taito), ground level, just to the southwest of Asakusa Main Street Leyline.
Miman #23: This Miman is almost directly east of the Umayabashi Leyline on your in-game map. In the block maze, in the southwest section near a chest. This one is relatively easy to get to if you start at the Komagata Leyline at the top, jump off to the northwest, and just keep heading west and southwest.
Miman #24: Start at the Komagata Leyline and go northeast, you’ll see this Miman below you as you stand on the crooked-blocks path. The Miman is east of the petrified Ose.
Miman #25: Start at the Komagata Leyline and jump off to the northwest. Then, head west and slightly south until you go up some stairs. Look right. Jump to the block below you, then jump to the Miman.
Miman #26: Warp to the Komogata leyline, cross the curved/crooked blocks. Turn right and go straight south, then fall off the edge. The Miman is behind you.
Miman #27: This Miman is northwest of the Umayabashi Leyline. Climb up the block and jump to the roof to the southeast.
Miman #28: Further west of the previous Miman, head down the narrow path to find the Miman nearby.
Miman #29: The Miman is located at the far center west of the map, near the edge, in the snow. It is almost straight west from the Ueno Leyline if you’re looking at the map.
Miman #30: This Miman is located far west past the Shinobazu pond Leyline, past the Abscess nearby.
Miman #31: This Miman is on the north-south road south of the Pond, on the ground floor, behind a building on the east side of the road. The buildings are close to an intersection in the roads.
Miman #32: The Miman is west of the Shinobazo Pond Leyline. Head down to find it.
Miman #33: The Miman is further west of the Shinobazo Pond Leyline, on a roof to the south.
Miman #34: This Miman is north of the Shinobazu Pond Leyline, located in the landmass at the centre. You’ll find it northwest of the Sarasvati Demon NPC.
Miman #35: In the Shinobazu Pond Leyline, go to the Sarasvati demon NPC in the middle. Move past her towards the east, then go north past the climbing rock. The Miman is at the edge.
Miman #36: From the previous Miman, climb up the blocks and go south to find this Miman.
Miman #37: From the Umayabashi Leyline, move east through the buildings to find this Miman.
Miman #38: From the Umayabashi Leyline, head north and slightly east through the buildings. The Miman is nearby.
Miman #39: From the Umayabashi Leyline head north until you meet the Thrones demon NPC. Then take a right, then a left at the next set of Thrones. Head into a building, and then head north through a narrow path; this Miman will be on a roof in front of you.
Miman #40: From the Ueno Leyline, head northwest and then down the road to the west, where the Hecatoncheires are. Keep going down this street until you can turn left (south), and you should see a bullet train. Head northeast up the train tracks until you can turn left (west, where it’s almost a u-turn). You’ll run into buildings you can enter. The Miman is here, on the north side of the buildings.
Miman #41: From the last Miman, head southeast across the train tracks and drop down, then turn around. You can go underneath the train tracks. Follow the path to the northeast to a Miman.
Miman #42: Remember when you went underneath the train tracks for the last Miman? Go back to where you entered underneath the train tracks a second ago and head southeast to the next road. This Miman is under the road, northeast.
Miman #43: The Miman is on a rock mountainous thing bordering west of the Ueno Leyline.
Miman #44: Head up northeast on the train tracks on the east side of the road/bridge. The Miman is west of the Ueno Leyline in the center area.
Miman #45: Head north from the Ueno Park Leyline (take a right before Zeus). On a rooftop just past the cliff is where the Miman is at.
Miman #46: This Miman is at the north part of the Taito map, near a chest. It’s northeast of Abaddon.
Miman #47: This Miman is on a building in the very far center west of the map.
Miman #48: This Miman is located east and a bit south of Ueno Park Leyline, at the border of the map, near a vending machine. If you see the Kaya-no-Hime demon NPC, you’re inn the right spot.
Miman #49: From where you fought Garuda in the story, head northwest onto the building. The Miman is just there.
Miman #50: From where you fight Garuda, you can jump off to the buildings to the east. This Miman is hiding in a building on a lower level.
By Team KKP|January 5, 2021
Hi! It’s Su Ling Chan here, the voice actress for Mayday from No Straight Roads! 2020 was a very different year for me. I’ve never re...

By Alleef Ashaari|February 22, 2019
Fans of Gerard Way were miffed earlier this week when UK-based Metro published an article titled "Who is Gerard Way", and referred to the former My...
By Alleef Ashaari|December 3, 2019
We're already halfway through (four episodes into) The Mandalorian, and the one thing unifying Star Wars fans all over the world is the introduction o...

By Mr Toffee|November 20, 2024

By Team KKP|October 29, 2024

By Kenn Leandre|October 25, 2024

By Mr Toffee|October 24, 2024

By Team KKP|October 21, 2024

By Lewis "lickety" Larcombe|September 18, 2024

By Alisha Alix|August 20, 2024

By Alleef Ashaari|July 17, 2024

By Team KKP|July 1, 2023

By Alleef Ashaari|August 2, 2021
By Alleef Ashaari|February 9, 2022

By Mr Toffee|November 20, 2024

By Team KKP|October 29, 2024

By Kenn Leandre|October 25, 2024

By Mr Toffee|October 24, 2024

By Team KKP|October 21, 2024

By Lewis "lickety" Larcombe|September 18, 2024

By Alisha Alix|August 20, 2024

By Alleef Ashaari|July 17, 2024

By Team KKP|July 1, 2023

By Lewis "lickety" Larcombe|November 23, 2024

By Mr Toffee|November 23, 2024

By Mr Toffee|November 20, 2024

By Team KKP|October 29, 2024

By Kenn Leandre|October 25, 2024

By Mr Toffee|October 24, 2024

By Team KKP|October 21, 2024

By Lewis "lickety" Larcombe|September 18, 2024

By Alisha Alix|August 20, 2024

By Alleef Ashaari|July 17, 2024

By Team KKP|July 1, 2023
Copyright @ Kakuchopurei 2024